I CT For


Check 'Em!


My Blinkies!

Peaches Blog Train!

My Avatars (DO NOT SNAG)


Saturday, January 11, 2014
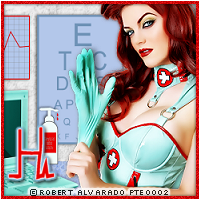
CT Tutorial "Velvet" Celinart Pinup & "Darkness Falls" PinkParadox Productions

Supplies Needed
Photo Editing Software: I am using PaintShopPro X3 but any version will work.
Kit: "Darkness Falls" by PinkParadox Productions. This is a PTU kit; do NOT share it!
Tube: "Velvet" by ©Celinart Pinup. This is a PTU kit; do NOT share it. *You must have proper license to use this tube*.
Template: "113mpm" by Millie.
Mask: WSL_Mask209 by weescotslass.
Plugins: Xero - Fritillary, EyeCandy 4000 - Gradient Glow
Elements: 1, 2, 23, 26, 48, 50, 58, 100, 115 Papers: 1, 4, 6, 18, 23
Abbreviations used in this tutorial: C/P/R/S: copy/paste/resize/sharpen.
Let's get started!
First, open up your template and hit SHIFT + D to duplicate, then close the original. Delete copyright layer. C/P/R/S Paper 23 above layer "1". Erase any excess paper. Selections -> Select All, Selections -> Float, Selections -> Defloat. Selections -> Modify -> Set Selection Borders with 5 as your setting. Add a new raster layer and flood-fill black, adding a noise setting of 60 and a dropshadow.
Highlight layer "2". C/P/R/S Paper 6 and delete any excess paper. Selections -> Select All, Selections -> Float, Selections -> Defloat. Selections -> Modify -> Set Selection Borders with 4 as your setting. Add a new raster layer and flood-fill #a45990, adding a noise setting of 40 and a dropshadow. Repeat this for layer "3".
Highlight layer "4" and C/P/R/S paper 1 and delete any excess paper. Create a gradient of #000000 and #a45990 with the following settings: Angle - 60, Repeats - 3, Invert - Unchecked, Linear Pattern. Selections -> Select All, Selections -> Float, Selections -> Defloat. Selections -> Modify -> Set Selection Borders with 4 as your setting. Add a new raster layer and flood-fill with gradient, adding a noise setting of 60 and a dropshadow.
Highlight layer "5" and Selections -> Select All, Selections -> Float, Selections -> Defloat. Floodfill with above gradient. Effects -> Plugins -> Xero -> Fritillary with the following settings: 5, 30, 19, 85. Add a dropshadow. Hightlight layer "6"; I chose to delete this layer.
Highlight layer "7"; C/P/R/S paper 18, delete any excess paper. Highlight layer "8"; Add a new raster layer and flood-fill with #a45990, adding a noise setting of 20 and a dropshadow. Highlight layer "9"; add preferred dropshadow. Highlight layer "10"; Selections -> Select All, Selections -> Float, Selections -> Defloat. Add a new raster layer and flood-fill with gradient. Effects -> Plugins -> EyeCandy 4000 -> Gradient Glow with the following settings: 3.00, 25, 100, color - white. Repeat this for layer "11."
Next, open your tube; C/P/R/S on your canvas above all layers. Position as preferred and add a dropshadow. Open elements, C/P/R/S and place as desired. I duplicated and mirrored elements 1, 23, 26, 50 and 100. Go to the bottom and highlight layer "background"; C/P/R/S paper 6. Layers -> Load/Save Mask -> Load Mask from Disk and apply your mask. Place where desired so only a little shows from the top. Add your copyright & name and then you're done!
Please feel free to email any creations you make using this tutorial to mbalmerswifetuts@gmail.com!
This tutorial was written by me, Ruinations by Hayleigh on January 11, 2014 from my own imagination. Any resemblance to another tutorial is purely coincidental. This was written assuming you have working knowledge of PSP. Please do not claim this tutorial as your own!

Subscribe to:
Post Comments
(Atom)
About Me

- Hayleigh
- Oklahoma
- I'm a 30 year old SAHM to 3 adorable boys and newlywed to a wonderful husband. I've been using PSP for 9 years.
CU Licenses

Stamps

0 comments:
Post a Comment