I CT For


Check 'Em!


My Blinkies!

Peaches Blog Train!

My Avatars (DO NOT SNAG)


Thursday, May 23, 2013
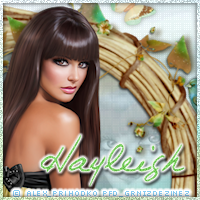
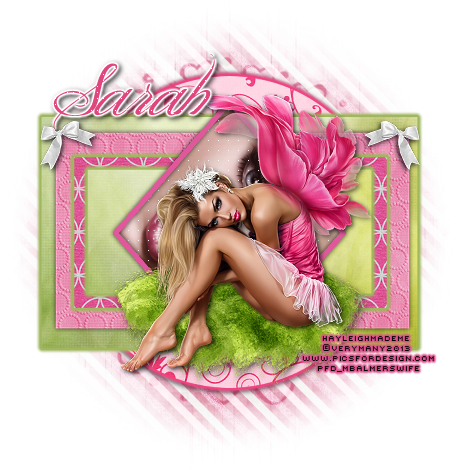
CT Tag Showoff

Kit by: PinkParadoxProductions (Just Beachy)
Tube By: Very Many (PicsforDesign)
Tag by: TutorialsByHayleigh

Wednesday, May 22, 2013
PTU Tut "In The Garden"

This tutorial was written assuming you have a working knowledge of PSP.
Supplies:
:|: Tube :|:
Julia by VeryMany. Can be purchased at PicsForDesign. Do not use tubes without proper copyrights.
:|: Kit :|:
In My Garden by PinkParadoxProductions. Can be purchased at stores listed on her blog. I *bleeping* love this kit!
:|: Plugins :|:
Eye Candy 4000-Gradient Glow
Eye Candy 4000-Glass
Xero-Radiance
:|: Mask :|:
WSLMask_220. Can be found at weescottslass's blog.
:|: Elements :|:
PPP-In My Garden-E51
PPP-In My Garden-E53
PPP-In My Garden-E56
PPP-In My Garden-E62
PPP-In My Garden-E72
PPP-In My Garden-E90
PPP-In My Garden-F2
PPP-In My Garden-P9
PPP-In My Garden-P11
:|: Fonts :|:
Let's get started. Open a new project in PSP (700x700, transparent). Open the frame, resize/sharpen to your preference. Using your magic wand tool, click inside the big square in the frame - Selections - Expand - 5. Copy/paste PPP-In My Garden-P9 - Selections - Invert & hit delete on your keyboard twice. Copy/paste the close-up of your tube above the paper layer. Activate paper layer - Selections - Select All - Float - Defloat - Invert. Activate the tube layer and hit delete on the keyboard to erase excess tube. In layer palette double click the tube layer - Blend Mode - Luminance (Legacy) - Opacity - 35. Effects - Plugins - Xero - Radiance & use default settings.
Open all the elements, resize/sharpen as you prefer and arrange to your liking or like my example. Add dropshadow to elements & frame (I used 1, -1, 75, 6.99, black). Copy/paste your tube, place where you want it. Duplicate. Activate duplicated layer - double click the layer - Blend Mode - Soft Light. Activate the original tube layer - Effects - Plugins - Xero - Radiance using default settings. Add dropshadow (2, 2, 75, 6.99, black). Open the other paper, copy/paste as the last layer behind everything. Layers - Load/Save Mask - Load Mask from Disk - click on WSLMask_220. Resize/sharpen and erase all the mask poking out the bottom of the tag.
Add names and your copyright and you're done!
Tuesday, May 21, 2013
PTU Tut "Heart of Hearts"

This tutorial was written assuming you have a working knowledge of PSP.
SUPPLIES
:|: Tube :|:
I used the "Flower Fairy" tube from VeryMany. You can purchase that tube at PicsforDesign; please do NOT use any PTU tubes without the proper license.
:|: Kit :|:
I am using the fantastic kit "Boy Meets Girl" created by Designs By Sarah. This kit can be purchased at PimpMyTagswithScraps.
:|: Plugins :|:
EyeCandy4000-Gradient Glow
EyeCandy4000-Glass
:|: Fonts :|:
:|: Elements :|:
sb_pmt_boy-meets-girl_bow 1
sb_pmt_boy-meets-girl_button 1
sb_pmt_boy-meets-girl_button 2
sb_pmt_boy-meets-girl_flower 1
sb_pmt_boy-meets-girl_flower 2
sb_pmt_boy-meets-girl_flower 3
sb_pmt_boy-meets-girl_frame 1
sb_pmt_boy-meets-girl_heart line
sb_pmt_boy-meets-girl_rose 1
:|: Papers :|:
sb_pmt_boy-meets-girl_pp4
Lets get started! Begin a new project (700x700-transparent), open your frame, copy/paste & resize/sharpen as preferred. Next grab your magic wand and click inside the frame - Selections - Expand (expand by 5). Open your paper, copy/paste, resize/sharpen - Selections - Invert and hit delete to delete the excess paper outside the frame. Move the paper layer below the frame layer. Open the heart line, resize/sharpen. Activate the paper layer - Selections - Select All - Float - Defloat - Invert. Activate the heart line layer & hit delete on your keyboard to delete excess line. Apply the glass effect using the following settings:

Position below the top of the frame towhere some is poking out (use my tag as an example of placement), duplicate and position that one at the bottom to match the top. Next open up the rest of the elements (on the bow I deleted everything but the ribbon in the center attaching the two bows), resize/sharpen as preferred and arrange to your liking (use my example for reference). Now open your tube, copy/paste & resize to your liking and position just below all the elements, erasing any leftover foot peeking out at the bottom.
Apply dropshadow to all layers except paper layer. Add name (I did Guitar On Stage in ALL CAPS then did the same name using Carpenter Script above the CAPS name layer) and all copyrights then you're done! No mask for this one. If you make this tag, please send me a copy to display on my blog!!
Monday, May 20, 2013
Sale Time!!
Hey guys; just wanted to update you. PinkParadox is having an end of May sale at her stores where you can get 30% her scrapkits! Click HERE to be taken to her blog where you can find a list of stores she sells at!!


Thursday, May 16, 2013
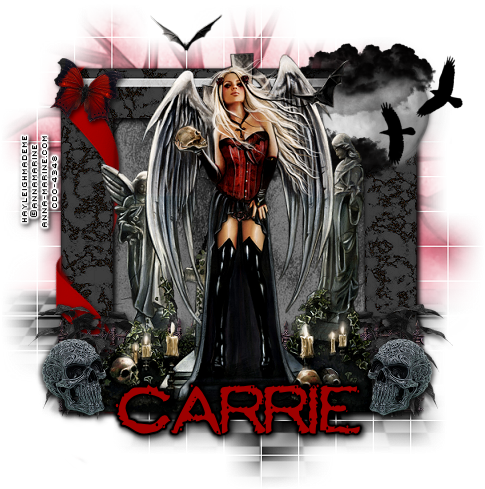
Future Offer/Tag Showoff
Hey here's a preview of a future offer at Twilight Designs:


I used the artwork of Anna Marine and a kit by PinkParadoxProductions! Keep an eye out at Twilight Designs to request it!
Wednesday, May 15, 2013
Cluster Frame Freebie
Here's a freebie cluster frame using PinkParadoxProductions's GraveObsessions PTU kit. Y'all so need to buy this kit! 122 elements, 15 frames & 10 papers!!! First a preview of the kit:


Visit PINKPARADOXPRODUCTIONS to find out where to buy this fabulous kit! And here's the cluster frame (larger than shown here):

Please download here!
New CT Tag "Deadly"
Kit Used: Grave Obsessions by PinkParadoxProductions
This is such a fantastic kit! I will have more tags and freebie cluster frame featuring this kit all coming soon!
Monday, May 13, 2013
PTU Tutorial "SteamPunk Princess"

This tutorial was written assuming you have a working knowledge of PSP.
Supplies Needed:
:|: Tube :|:
I am using a fab tube from VeryMany. You can purchase this tube at PicsforDesign. Do NOT use VeryMany's tubes without the proper license!
:|: Kit :|:
Steampunk Dreams by Designs By Sarah. You can purchase this kit at PimpMyTagsWithScraps. Please do NOT share this kit.
:|: Font :|:
Penshurst & Victor's Pixel Font (both are FTU and can be found at dafont)
:|: Plugins :|:
EyeCandy4000-GradientGlow, EyeCandy4000-Glass
:|: Mask :|:I used a mask from weescottslass; download WSL_236.
:|: Elements :|:
sb_pmt_steampunk-dreams-frame 3
sb_pmt_steampunk-dreams-eyelet 1
sb_pmt_steampunk-dreams-butterfly
sb_pmt_steampunk-dreams-beads 1
sb_pmt_steampunk-dreams-flower 1
sb_pmt_steampunk-dreams-flower 2
sb_pmt_steampunk-dreams-greenery 2
sb_pmt_steampunk-dreams-leaves 1
:|: Papers :|:
sb_pmt_steampunk-dreams-pp2
sb_pmt_steampunk-dreams-pp1
Lets get started!! Open a new project; copy and paste sb_pmt_steampunk-dreams-frame 3, resize/sharpen as preferred. Open sb_pmt_steampunk-dreams-pp2, Layers -> Load/Save Mask -> Load Mask From Disk and choose WSL_236. Merge group, resize & sharpen as preferred or so that only a little bit of the mask peeks out behind the frame.
Open sb_pmt_steampunk-dreams-pp1, use your magic wand click inside the frame, expand by 3, invert. Activate paper layer and hit delete on the keyboard twice. Now open up all other elements except the beads, resize/sharpen as preferred and arrange like my example or however you like them. I mirrored everything so they were equal on both sides.
Open up the beads, resize/sharpen and place above paper layer but below frame layer. Duplicate as many times as needed so they cover the paper evenly. Then add the tube below the frame layer. Use your eraser tool to erase any excess tube below the flower arrangement. Activate your frame layer and zoom 200% to see the outlines better. Erase the frame that overlaps her face (I kept her ponytail behind the frame cause I think it looks cool that way but you can erase that part of the frame as well).
Add a dropshadow of 2, 2, 75, 6.99, black to all elements, the tube & the frame. Add your name ( I used EyeCandy4000-Gradient Glow & Glass on my name) and all copyrights. You're done! If you make a tag using this tutorial please email it to me! I'd love to see what you guys make!
New CT Tag "So Blue"
Hey I got to play around with Carrie's newest kit in stores called "So Blue." You can purchase that kit at Wickedly Ditzy Scraps! Here's a preview of the kit:


And here's the tag I made with it; tutorial for this tag will come at a later date (click to view normal size):
Saturday, May 11, 2013
New CT Tag "Think Pink"


Monday, May 6, 2013
Re-Doing My Blog
So I'm in the process of re-doing my blog layout and stuff so if you see it and it looks a little weird, that's why. I'm hoping it'll be bangin when it gets done.

Sunday, May 5, 2013
PTU Tutorial "Love"
Designs by Sarah has a fabulous kit at Pimp My Tags with Scraps called "Like a Virgin." I had the pleasure of working with it and it's one of my favorites! Without further ado, here's the tutorial (click the image to see it full-size):

Open up the template - CTRL+D to duplicate and close the original. Open sb_pmt_like-a-virgin_pp3, copy/paste and resize/sharpen as preferred. Paste above the large rectangle layer. Selection -> Select All -> Float -> Defloat -> Invert and delete excess paper. Apply gradient glow to the paper layer and dropshadow.
Next up is the circle layer. Open sb_pmt_like-a-virgin_pp11, copy/paste and resize/sharpen as preferred. Paste above the circle layer Selection -> Select All -> Float -> Defloat -> Invert and delete excess paper. Make a border around the circle background and flood fill black; add dropshadow.
Now for the wordart. Activate the wordart layer. Open sb_pmt_like-a-virgin_pp8, copy/paste and resize/sharpen as preferred. Use your magic wand, click inside the "L" & "V" letters, add new raster layer and flood fill black. Deselect. Now use your magic wand to select the "O" & "E" letters. Selections -> Invert and delete excess paper. Add gradient glow and dropshadow.
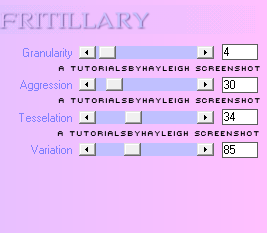
Activate the thin rectangle layer & Selections -> Select All -> Float -> Defloat; add a new raster layer and flood fill black. Add gradient glow & dropshadow then open element sb_pmt_like-a-virgin_ribbon 2, resize/sharpen and place over the black rectangle. Activate the heart layer & Selections -> Select All -> Float -> Defloat; add a new raster layer and flood fill with #b88d8a. Effects -> Plugins -> Xero -> Fritillary and use these settings:
Supplies Needed:
:|: Tube: I am using a tube by Alex Prihodka called "Springtime." Please go HERE to purchase this tube; do NOT use this tube without the proper license.
:|: Kit: I am using Designs By Sarah's "Like A Virgin." This is a PTU kit and it can be purchased HERE.
:|: Mask: I am using WSL_Mask84 which you can find HERE on the blog.
:|: Template: I am using missy_tagtemplate139 which can be found HERE on her blog.
:|: Filters: EyeCandy4000 - Glass & Gradient Glow, Xero-Fritillary
:|: Fonts: Shit Happens & Victor's Pixel Font
Let's get started!
Next up is the circle layer. Open sb_pmt_like-a-virgin_pp11, copy/paste and resize/sharpen as preferred. Paste above the circle layer Selection -> Select All -> Float -> Defloat -> Invert and delete excess paper. Make a border around the circle background and flood fill black; add dropshadow.
Now for the wordart. Activate the wordart layer. Open sb_pmt_like-a-virgin_pp8, copy/paste and resize/sharpen as preferred. Use your magic wand, click inside the "L" & "V" letters, add new raster layer and flood fill black. Deselect. Now use your magic wand to select the "O" & "E" letters. Selections -> Invert and delete excess paper. Add gradient glow and dropshadow.
Activate the thin rectangle layer & Selections -> Select All -> Float -> Defloat; add a new raster layer and flood fill black. Add gradient glow & dropshadow then open element sb_pmt_like-a-virgin_ribbon 2, resize/sharpen and place over the black rectangle. Activate the heart layer & Selections -> Select All -> Float -> Defloat; add a new raster layer and flood fill with #b88d8a. Effects -> Plugins -> Xero -> Fritillary and use these settings:
Now open up the following elements: sb_pmt_like-a-virgin_star, sb_pmt_like-a-virgin_scatter 4, sb_pmt_like-a-virgin_flower 2, sb_pmt_like-a-virgin_button 2 & sb_pmt_like-a-virgin_bow 1. Resize/sharpen and place as you want or where I placed mine in the example. Next up is the tube!
Open up your tube, resize/sharpen as preferred and place below the border layer for your circle. Delete excess tube on the bottom portion of the circle and delete border covering the tubes face with the eraser tool. Done?
Open up sb_pmt_like-a-virgin_pp3 and place below the big rectangle. Apply mask and resize/sharpen as you like. Now add the name (I used the EyeCandy4000-Glass filter on the name) and all copyrights. Crop out the excess background & save as a .png file and your done!
Saturday, May 4, 2013
Tag Showoff!
I made this tag using Designs By Sarah's Collab kit titled "Lily." You can find the link HERE to purchase her part of this great collab! Here's a preview of the kit:


Here's the tag I made with it:
Thursday, May 2, 2013
Tag Showoff!
Sweet Addictionz Scraps has a great FTU kit out called Beach Bound! Here's a preview of the kit:


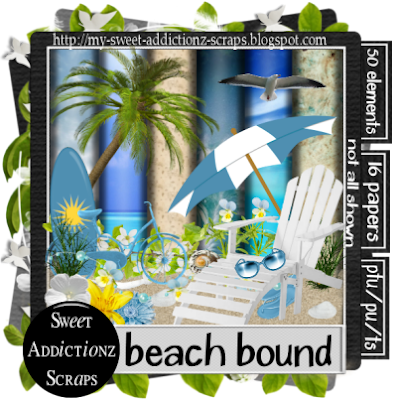
You can download it at her blog found HERE! It's a great kit; remember to leave love if you download!
Here's a tag I made with the kit:
Wednesday, May 1, 2013
PTU Tutorial "Always"

Supplies Needed
:|: Tube: I used a FTU tube by ZindyNielson. You can find that tube HERE. Don't forget to use the proper copyrights!
:|: Template: I used a template by Yvette. Template is included in the supplies folder.
:|: Mask: I used a mask by Vix.
:|: Kit: Kit used is a PTU from Designs By Sarah called Cordially Invited. You can purchase this kit HERE at her store. This is a great kit Sarah!
:|: Filters: EyeCandy4000-GradientGlow, Xero-Fritillary, EyeCandy4000-Glass.
:|: Font: I used Great Vibes and Victor's Pixel Font.
:|: Supplies Folder: Find the supplies HERE.
Let's get started!
Open up the template from the supplies folder - CTRL+D to duplicate and close the original. Open sb_pmt_cordially_invited_pp2, copy/paste and resize/sharpen as preferred. Paste above the large rectangle layer. Selection -> Select All -> Float -> Defloat -> Invert and delete excess paper. Apply gradient glow to the paper layer and dropshadow.
Next up is the circle layers. Open sb_pmt_cordially_invited_pp8, copy/paste and resize/sharpen as preferred. Paste above the first circle layer, duplicate and move the duplicated paper layer above the other circle layer. Selection -> Select All -> Float -> Defloat -> Invert and delete excess paper. Apply gradient glow to the paper layer and dropshadow. Do the same for the other circle layer.
Now for rectangle 1. Activate the rectangle1 layer. Open sb_pmt_cordially_invited_pp11, copy/paste and resize/sharpen as preferred. Selection -> Select All -> Float -> Defloat -> Invert and delete excess paper. Effects -> Plugins -> xero -> Fritillary and use the following settings:

Apply gradient glow (color is #801616) to the paper layer and dropshadow.
Activate the background layer. Open sb_pmt_cordially_invited_pp3, copy/paste and resize/sharpen as preferred. Selection -> Select All -> Float -> Defloat -> Invert and delete excess paper. Activate the Frame layer. Selection -> Select All -> Float -> Defloat, add a new raster layer and flood fill inside the ant lines with black. Apply gradient glow (color is #801616) to the black frame layer and dropshadow.
Now open the following elements: sb_pmt_cordially_invited_brooch, sb_pmt_cordially_invited_button 1, sb_pmt_cordially_invited_key, sb_pmt_cordially_invited_leaves 1, sb_pmt_cordially_invited_ribbon 4, sb_pmt_cordially_invited_sparkle 1 and sb_pmt_cordially_invited_word art 1. Copy/paste and resize/sharpen as preferred and place like mine or however you like them.
Now for the mask. Open sb_pmt_cordially_invited_pp11 and place at the bottom of the layers. Layers -> Load/Save Mask -> Load Mask from Disk and choose Vix_BigMask019 from the dropdown menu. Merge group and resize/sharpen to your liking.
Now add name and all copyrights and save as a .png file and your done!
Subscribe to:
Posts
(Atom)
About Me

- Hayleigh
- Oklahoma
- I'm a 30 year old SAHM to 3 adorable boys and newlywed to a wonderful husband. I've been using PSP for 9 years.
CU Licenses

Stamps