I CT For


Check 'Em!


My Blinkies!

Peaches Blog Train!

My Avatars (DO NOT SNAG)


Saturday, June 22, 2013
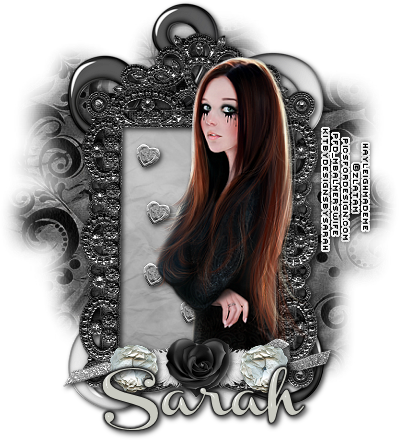
New PTU Tutorial "Fallen"
This tutorial was written assuming you have a working knowledge of PSP. Any resemblance to another tutorial is coincidental.
Supplies:
:|: Tube :|:
I used a tube by Zlata M called "Wings". You can purchase this tube at PicsForDesign. Please don't use PTU tubes without the proper license.
:|: Kit :|:
I used a great kit called "Fallen" by Designs By Sarah. You can purchase this kit now at PimpMyTagsWithScraps. Please do not share PTU kits!
:|: Template :|:
No template used.
:|: Mask :|:
I used WSL_Mask230. You can find this mask at weescotslasscreations.
:|: Plugins :|:
Eye Candy 4000 - Gradient Glow, Glass (used on name)
Eye Candy 4000 - Gradient Glow, Glass (used on name)
:|: Fonts :|:
:|: Elements & Papers :|:
sb_pmt_fallen_feather 1
sb_pmt_fallen_flower 1
sb_pmt_fallen_flower 4
sb_pmt_fallen_frame 5
sb_pmt_fallen_heart 1
sb_pmt_fallen_ribbon 4
sb_pmt_fallen_swirl 1
sb_pmt_fallen_pp1
sb_pmt_fallen_pp8
Let's get started!
Open a new project in PSP (700x700, transparent). Copy/paste/resize/sharpen sb_pmt_fallen_frame 5. Take your magic wand (tolerance: 45) and click inside the frame. Selections - modify - expand & expand by 4. Copy/paste/resize/sharpen pp8 below the frame layer - Selections - Invert, hit delete on the keyboard to delete excess paper.
Copy/paste/resize/sharpen your elements except the heart 1 element and place where desired. Now copy/paste/resize/sharpen the heart 1. Place above paper layer but below frame layer. Duplicate several times and arrange over paper. Now copy/paste/resize/sharpen your tube. Place above frame layer but below elements. Use your Selection tool and draw a rectangle starting at the edge of the bottom of the frame and draw it down to cover the bottom part of the tube you don't want to be shown. Now hit delete on your keyboard to delete excess tube.
Copy/paste pp1 below all layers but above background layer. Layers - Load/Save Mask - Load/Save Mask from Disk and choose WSL_Mask230. Resize/sharpen as needed. Now go back and add a dropshadow to all the layers except both paper layers. Add name and copyrights and your done!! If you make a tag following this tutorial please feel free to email it to me as I'd love to see your creations!
Subscribe to:
Post Comments
(Atom)
About Me

- Hayleigh
- Oklahoma
- I'm a 30 year old SAHM to 3 adorable boys and newlywed to a wonderful husband. I've been using PSP for 9 years.
CU Licenses
Stamps

0 comments:
Post a Comment