I CT For


Check 'Em!


My Blinkies!

Peaches Blog Train!

My Avatars (DO NOT SNAG)


Monday, June 24, 2013
New CT PTU Tutorial "Girly Goth"

This tutorial was written assuming you have a working knowledge of PSP. Any resemblance to another tutorial is coincidental.
Supplies:
:|: Tube :|:
"Barbara" by VeryMany. You can purchase this tube at PicsForDesign.
:|: Kit :|:
"Girly Goth" by PinkParadoxProductions. You can purchase this kit at PicsForDesign.
:|: Template :|:
Template1 by Me. Download from my blog.
:|: Mask :|:
No mask used.
:|: Fonts :|:
Feathergraphy Decoration
Victor's Pixel Font
:|: Plugins :|:
Eye Candy 4000-Gradient Glow
:|:Elements & Papers :|:
PPP-Girly Goth-E3
PPP-Girly Goth-E11
PPP-Girly Goth-E15
PPP-Girly Goth-E16
PPP-Girly Goth-E24
PPP-Girly Goth-E33
PPP-Girly Goth-E80
PPP-Girly Goth-E88
PPP-Girly Goth-E96
PPP-Girly Goth-E108
PPP-Girly Goth-E111
PPP-Girly Goth-E112
PPP-Girly Goth-E168
PPP-Girly Goth-P2
PPP-Girly Goth-P5
PPP-Girly Goth-P14
PPP-Girly Goth-P17
Let's get started!
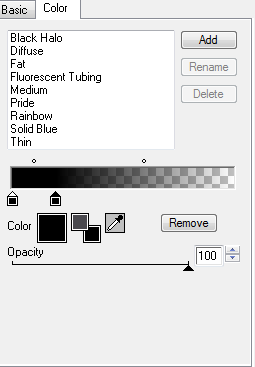
Open up my template and SHIFT+D to duplicate and close the original. Delete the © credit layer. Copy/paste/resize/sharpen PPP-Girly Goth-P5 above the "ThinRectangle1" layer.. Activate "ThinRectangle1" layer and Selections - Select All - Float - Defloat - Invert. Activate the paper layer and hit delete on your keyboard twice to delete any excess paper. Effects - Plugins - EyeCandy4000 - Gradient Glow and use the following settings:

Do the same to "ThinRectangle2", "LargeRectangle" with PPP-Girly Goth-P14 paper, "CircleLeft" with PPP-Girly Goth-P17, "CircleRight" with PPP-Girly Goth-P17 paper and "LargeCircle" with PPP-Girly Goth-P14. Replace all red "frame" layers with black and add dropshadow (2, 2, 75, 6.99, black). Now open all your elements and resize/sharpen them and place as you'd like or use my example to help you out. Add the same dropshadow to all element layers. Now add your tube. I placed mine below the cat layer but above the skull candle layers. Add a dropshadow to your tube, add your name & copyright and you're done!
Subscribe to:
Post Comments
(Atom)
About Me

- Hayleigh
- Oklahoma
- I'm a 30 year old SAHM to 3 adorable boys and newlywed to a wonderful husband. I've been using PSP for 9 years.
CU Licenses

Stamps

0 comments:
Post a Comment