My Licenses
MPT11646
CDO-4348
EAS14199
KG2666
PFD_mbalmerswife
PFD_6113
PTE0504
IRH3762A
SW5738
toosh2511
BHS-30
VMT_mbalmerswife
CI-4978-LM
SATC4343
AC1364
ZZT3579
C1018P
Powered by Blogger.
My Avatars (DO NOT SNAG)





Thursday, June 27, 2013
New Blog Layout
What do you guys think? Made by me using a kit called "Gothic Twilight" by PinkParadoxProductions & tube by artist Helleana!
Monday, June 24, 2013
Template #2
Hey guys. I made another template =) Follow the link below the preview below to download from 4shared!
Download link at 4shared: HERE
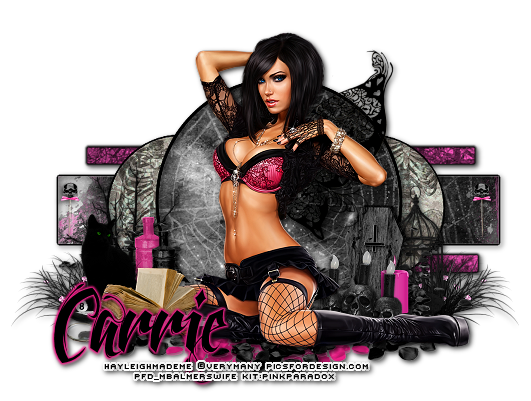
New CT PTU Tutorial "Girly Goth"
This tutorial was written assuming you have a working knowledge of PSP. Any resemblance to another tutorial is coincidental.
Supplies:
:|: Tube :|:
"Barbara" by VeryMany. You can purchase this tube at PicsForDesign.
:|: Kit :|:
"Girly Goth" by PinkParadoxProductions. You can purchase this kit at PicsForDesign.
:|: Template :|:
Template1 by Me. Download from my blog.
:|: Mask :|:
No mask used.
:|: Fonts :|:
Feathergraphy Decoration
Victor's Pixel Font
:|: Plugins :|:
Eye Candy 4000-Gradient Glow
:|:Elements & Papers :|:
PPP-Girly Goth-E3
PPP-Girly Goth-E11
PPP-Girly Goth-E15
PPP-Girly Goth-E16
PPP-Girly Goth-E24
PPP-Girly Goth-E33
PPP-Girly Goth-E80
PPP-Girly Goth-E88
PPP-Girly Goth-E96
PPP-Girly Goth-E108
PPP-Girly Goth-E111
PPP-Girly Goth-E112
PPP-Girly Goth-E168
PPP-Girly Goth-P2
PPP-Girly Goth-P5
PPP-Girly Goth-P14
PPP-Girly Goth-P17
Let's get started!
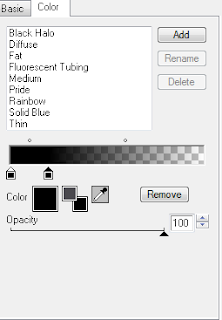
Open up my template and SHIFT+D to duplicate and close the original. Delete the © credit layer. Copy/paste/resize/sharpen PPP-Girly Goth-P5 above the "ThinRectangle1" layer.. Activate "ThinRectangle1" layer and Selections - Select All - Float - Defloat - Invert. Activate the paper layer and hit delete on your keyboard twice to delete any excess paper. Effects - Plugins - EyeCandy4000 - Gradient Glow and use the following settings:
Do the same to "ThinRectangle2", "LargeRectangle" with PPP-Girly Goth-P14 paper, "CircleLeft" with PPP-Girly Goth-P17, "CircleRight" with PPP-Girly Goth-P17 paper and "LargeCircle" with PPP-Girly Goth-P14. Replace all red "frame" layers with black and add dropshadow (2, 2, 75, 6.99, black). Now open all your elements and resize/sharpen them and place as you'd like or use my example to help you out. Add the same dropshadow to all element layers. Now add your tube. I placed mine below the cat layer but above the skull candle layers. Add a dropshadow to your tube, add your name & copyright and you're done!
Sunday, June 23, 2013
New CT Tag "Candyland"
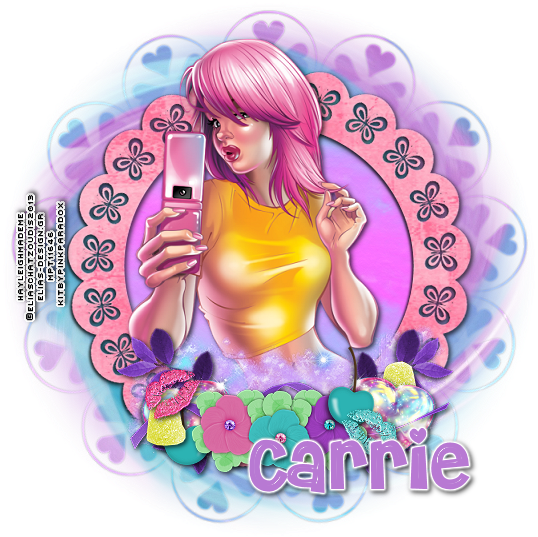
Here's a CT showoff tag I made using Pink Paradox Productions latest kit "Kawaii Candyland." This kit is full of fun, cute & delicious looking elements and fantastic papers...there are endless possibilities! Head over to PicsForDesign to purchase this kit now!
My First Template!!
Been playing around with PSP and decided to make a template! I hope you guys like it (it's larger than preview). Comes in .psd format.
Download at 4shared HERE
Saturday, June 22, 2013
New CT Tag Showoff + Freebie Cluster Frame
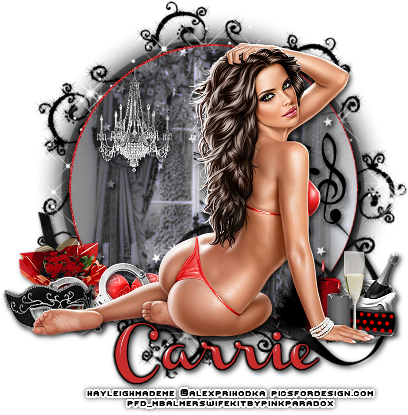
Below is a tag I made using Pink Paradox Production's "Dark Passions" kit. It's a huge kit containing 150 elements, 10 frames and 20 papers. It's a red/black/white color pallette and is great for all sorts of tags including sexy and love tags. Head over to PicsForDesign to purchase this kit. I've also included a freebie cluster frame below the CT tag =)
And here's a preview of the cluster frame; the link is below where you can download it:
Click HERE to download this cluster frame (kit preview not included and size is larger) at 4shared.
Name Script Tutorial
Okay I've been playing around with scripts for kit making and wanted to write a tutorial of sorts on how to record/run scripts for names when filling requests. This makes adding names to tags super easy and saves on time. I am using PSP X3...let's get started!
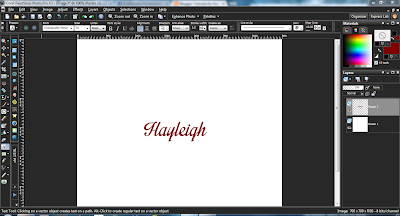
Open a new project in PSP (700x700, white background). Type out your name, resize it to however big you want it and convert to raster layer:
Open a new project in PSP (700x700, white background). Type out your name, resize it to however big you want it and convert to raster layer:
If you don't have your script toolbar added to your toolbar list go ahead and add it:
Now in your script toolbar menu there is an option to Start Script Recording...let's click it. **Anything you do after clicking record WILL be recorded so if you make a mistake you'll need to click Cancel Script Recording, undo everything you've done and restart the recording** **For this tutorial I'll be using EyeCandy4000-Gradient Glow & Glass. You can use whatever tho**
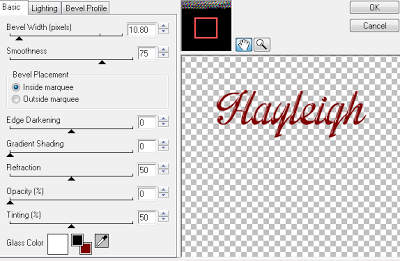
Now that we've started recording go ahead and do the steps to get your desired name effect. I started with glass:
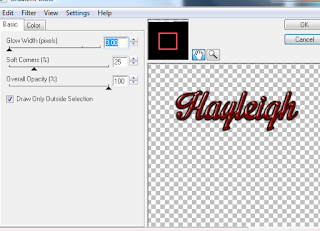
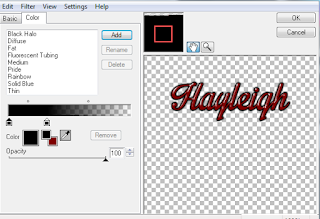
Now onto gradient glow:
Now a dropshadow. After you get the effect you want, click on Save Script Recording in the Script toolbar, this is what should pop up:
Always make sure to save it in your Scripts-Restricted folder and save it as a .PspScript file. Now run a test using a different name. When running the script you click on the dropdown menu in your script toolbar, click on the saved script and then click play and it should run through. You'll just have to click OK when menu options pop up and it should work. If you have questions, let me know and I'll try to help.
"Fallen" Cluster Frame Freebie
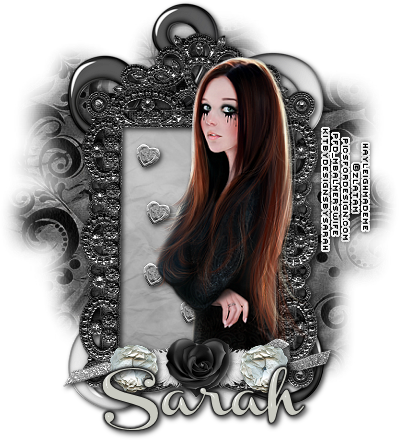
I made a cluster frame freebie using "Fallen" from Designs By Sarah. You can find the link HERE! Actual frame is larger than what's shown in preview below:
New PTU Tutorial "Fallen"
This tutorial was written assuming you have a working knowledge of PSP. Any resemblance to another tutorial is coincidental.
Supplies:
:|: Tube :|:
I used a tube by Zlata M called "Wings". You can purchase this tube at PicsForDesign. Please don't use PTU tubes without the proper license.
:|: Kit :|:
I used a great kit called "Fallen" by Designs By Sarah. You can purchase this kit now at PimpMyTagsWithScraps. Please do not share PTU kits!
:|: Template :|:
No template used.
:|: Mask :|:
I used WSL_Mask230. You can find this mask at weescotslasscreations.
:|: Plugins :|:
Eye Candy 4000 - Gradient Glow, Glass (used on name)
Eye Candy 4000 - Gradient Glow, Glass (used on name)
:|: Fonts :|:
:|: Elements & Papers :|:
sb_pmt_fallen_feather 1
sb_pmt_fallen_flower 1
sb_pmt_fallen_flower 4
sb_pmt_fallen_frame 5
sb_pmt_fallen_heart 1
sb_pmt_fallen_ribbon 4
sb_pmt_fallen_swirl 1
sb_pmt_fallen_pp1
sb_pmt_fallen_pp8
Let's get started!
Open a new project in PSP (700x700, transparent). Copy/paste/resize/sharpen sb_pmt_fallen_frame 5. Take your magic wand (tolerance: 45) and click inside the frame. Selections - modify - expand & expand by 4. Copy/paste/resize/sharpen pp8 below the frame layer - Selections - Invert, hit delete on the keyboard to delete excess paper.
Copy/paste/resize/sharpen your elements except the heart 1 element and place where desired. Now copy/paste/resize/sharpen the heart 1. Place above paper layer but below frame layer. Duplicate several times and arrange over paper. Now copy/paste/resize/sharpen your tube. Place above frame layer but below elements. Use your Selection tool and draw a rectangle starting at the edge of the bottom of the frame and draw it down to cover the bottom part of the tube you don't want to be shown. Now hit delete on your keyboard to delete excess tube.
Copy/paste pp1 below all layers but above background layer. Layers - Load/Save Mask - Load/Save Mask from Disk and choose WSL_Mask230. Resize/sharpen as needed. Now go back and add a dropshadow to all the layers except both paper layers. Add name and copyrights and your done!! If you make a tag following this tutorial please feel free to email it to me as I'd love to see your creations!
Thursday, June 20, 2013
New PTU Tutorial "Fortune Teller"
This tutorial was written assuming you have a working knowledge of PSP. Any resemblance to another tutorial is purely coincidental.
Supplies:
:|: Tube :|:
I used a FTU tube by Anne Stokes.
:|: Kit :|:
I used a PTU kit from PinkParadoxProductions called "Gypsy Girl." You can purchase this kit from PicsForDesign.
:|: Template :|:
No template needed.
:|: Mask :|:
I used WSL_Mask223. You can get this mask from weescotslasscreations. Make sure you leave love when downloading.
:|: Fonts :|:
:|: Elements/Papers :|:
PPP-Gypsy Girl-E4
PPP-Gypsy Girl-E5
PPP-Gypsy Girl-E8
PPP-Gypsy Girl-E9
PPP-Gypsy Girl-E15
PPP-Gypsy Girl-E19
PPP-Gypsy Girl-E26
PPP-Gypsy Girl-E39
PPP-Gypsy Girl-E40
PPP-Gypsy Girl-E61
PPP-Gypsy Girl-E66
PPP-Gypsy Girl-E114
PPP-Gypsy Girl-P2
Let's get started!
Open a new project (700x700 - transparent background). Copy/paste/resize/sharpen PPP-Gypsy Girl-E61. We're going to recolor the grass so it blends better with the muted colors of the other elements. I used the following settings:
Duplicate and mirror and situate the grass so it looks like one single row of grass. Copy/paste/resize/sharpen PPP-Gypsy Girl-E66 and position below the grass layer. Now open the rest of your elements, copy/paste/resize/sharpen and arrange on the tag as preferred...using my example to lead you if you like. Go ahead and add a dropshadow to all your element layers.
Open your preferred tube and resize/sharpen. Then add it to your tube below the grass layer but above the arch layer. Add a dropshadow to it. Copy/paste/resize/sharpen your paper layer and add it below the other layers but above your background layer. Layers - Load/Save Mask - Load Mask From Disk and select WSL_Mask223. Now add your name & copyrights & you're done! If you make a tag using this tutorial I'd love to see it!
Friday, June 14, 2013
*New* CT PTU Tutorial "Posh Pup"
This tutorial was written assuming you have a working knowledge of PSP. Any resemblance to another tutorial is purely coincidental.
SUPPLIES
:|: Tube :|:
I used an adorable tube by Maryline Cazenave. You can purchase her tubes at CDO.
:|: Kit :|:
I am using a PTU tube by PinkParadoxProductions called "Posh Pets." You can purchase this kit at PicsForDesign.
:|: Mask :|:
I used WSL_Mask249. You can find it at weescotslasscreations.
:|: Template :|:
I used missy_tagtemplate111. You can find it at DivineIntentionz.
:|: Plugins :|:
EyeCandy4000 - Gradient Glow + Glass
:|: Fonts :|:
:|: Elements :|:
PPP-Posh Pets-E6
PPP-Posh Pets-E12
PPP-Posh Pets-E15
PPP-Posh Pets-E21
PPP-Posh Pets-E24
PPP-Posh Pets-E25
PPP-Posh Pets-E40
PPP-Posh Pets-E41
PPP-Posh Pets-E45
PPP-Posh Pets-E47
PPP-Posh Pets-E48
PPP-Posh Pets-P2
PPP-Posh Pets-P4
PPP-Posh Pets-P5
Let's Get Started!
Open missy's template, SHIFT+D to duplicate and close the original template. Delete the watermark, rectangle and square layers, leaving you with just the circles and shapes layers. Copy/paste/resize/sharpen PPP-Posh Pets-P5 above "circle1" layer. Activate "circle1" layer - Selections - Float - Defloat - Invert, activate P5 layer and hit delete on the keyboard to delete excess paper. Copy/paste/resize/sharpen PPP-Posh Pets-P4 above "circle2" layer. Activate "circle2" layer - Selections - Float - Defloat - Invert, activate P4 layer and hit delete to erase excess paper. Now activate "shape1" layer - Selections - Float - Defloat. Add a new raster layer and flood fill inside the ant lines with #b5b5b5. Effects - Plugins - EyeCandy4000 - Gradient Glow with the following settings:
Now activate the "shape2" layer - Selections - Float - Defloat. Add a new raster layer and flood fill inside the ant lines with #212121. Add a dropshadow. Now open up all of your elements, resize/sharpen and place where desired, using my example to help you out. Add a dropshadow to all the elements. Now open your tube and copy/paste/resize/sharpen as preferred. Now copy/paste PPP-Posh Pets-P2 right above the background layer. Layers - Load/Save Mask - Load Mask From Disk and select WSL_Mask249. Now add your name and copyright, crop and your done! Send me examples of tags made with this tutorial!
Thursday, June 13, 2013
*SALE*
Pink Paradox Productions is having a 20% off EVERYTHING sale for the remainder of June. Now is the perfect time to snag some kits and CU items! Head over to PicsForDesign and check out her amazing kits!
Freebie Cluster Frame "Stars & Stripes"
Here's a freebie cluster frame I made from the PTU kit by Pink Paradox Productions "Stars and Stripes" kit. This kit is available for purchase at PicsForDesign now! Please click the link below the frame preview (the frame is bigger than what's shown here):
4shared download link: HERE
New CT Tag ShowOff *Summer Lovin'*
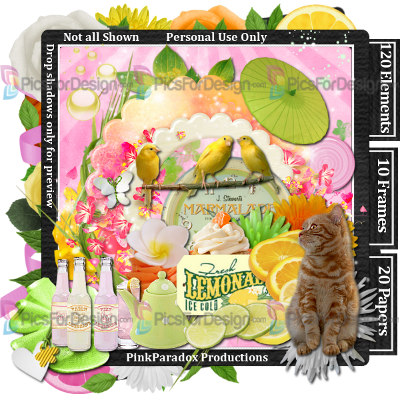
Here's a CT tag using the "Citrus" kit from PinkParadoxProductions and tube "Julia" from VeryMany. You can purchase both the kit & the tube from PicsForDesign. I recolored "Julia's" top to match the kit colors. Here's a preview of the PTU kit "Citrus":
Sunday, June 9, 2013
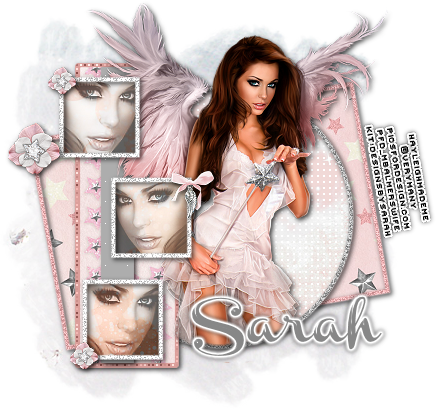
New PTU Tutorial "My Angel"
Tutorial written assuming you have a working knowledge of PSP; any resemblance to another tutorial is purely coincidental.
SUPPLIES
:|: Tube :|:
I used "Angel" by VeryMany. You can purchase that tube at PicsForDesign. Please do not use any PTU tubes without proper license!
:|: Kit :|:
I used a PTU kit by DesignsBySarah called "My Angel." You can purchase this kit at Pimp My Tags With Scraps.
:|: Template :|:
I used MC_Template51 by Melissaz Creationz. You can find that on her blog HERE.
:|: Mask :|:
WSL_Mask255 which can be found at weescotslass creations.
:|: Font :|:
:|: Plugins :|:
EyeCandy4000- Gradient Glow, Glass
Pentacom - Dot & Cross
Xero- Radiance
:|: Elements :|:
sb_pmt_my_angel_bow 2
sb_pmt_my_angel_flower 4
sb_pmt_my_angel_pp2
sb_pmt_my_angel_pp4
sb_pmt_my_angel_pp5
sb_pmt_my_angel_pp7
sb_pmt_my_angel_pp9
Let's get started!
First, open your template and press SHIFT+D to duplicate and close the original. Activate "bottom rectangle" layer; Selections - Select All - Float - Defloat. Copy/paste/resize/sharpen as preferred sb_pmt_my_angel_pp7 above "bottom rectangle" layer. Selections - Invert and hit delete on your keyboard to delete excess paper. Delete original rectangle layer. Activate the "bottom rectangle frame," Selections - Float - Defloat. Change color to #e1a9aa and add a new raster layer. Flood fill in between the ant lines and delete original frame layer. Adjust - Add/Remove Noise - Uniform & Monochrome checked, setting at 35. Add desired dropshadow.
Repeat for "circle" layer using sb_pmt_my_angel_pp4 and flood filling the "circle frame" layer with #929292. Add noise again using 75 this time. Activate the circle paper layer, Effects - Plugins - Pentacom - Dot & Cross and use these settings: 255, 10 & 6. Next up is the "rectangle" layer. Add sb_pmt_my_angel_pp9 using the above steps, and flood fill frame layer with #dc9f9b. Now for the "narrow rectangle" layer. Flood fill it with #adadad and add the above Dot & Cross settings.
Activate the squares layer follow the same steps above using sb_pmt_my_angel_pp5. Leave the frame white but add noise setting it at 75 and add a dropshadow. Copy/paste a close-up of your tube, resize & sharpen as preferred, deleting any excess tube. Duplicate your tube layers, change the blend mode on the duplicated tube layer to Soft Light, opacity set to 50%. On the original tube layer change the blend mode to Luminance (Legacy), lower opacity also to 50%. Effects - Plugins - Xero - Radiance and use default settings.
Now copy/paste your tube above the circle frame layer. Grab your eraser tool and erase excess tube on the bottom of the frame circle. Now copy/paste/resize/sharpen all the aforementioned elements and rearrange as you like. Use my example to help you with placement if you like. Copy/paste sb_pmt_my_angel_pp2, Layers - Load/Save Mask - Load Mask from Disk and select WSL_Mask255. Resize/sharpen as needed. Now add the name to the tag (I used Channel font, #878787 as the color of the font, used EyeCandy4000- Glass and Gradient Glow then added a dropshadow). Next add your copyrights and your done!
Friday, June 7, 2013
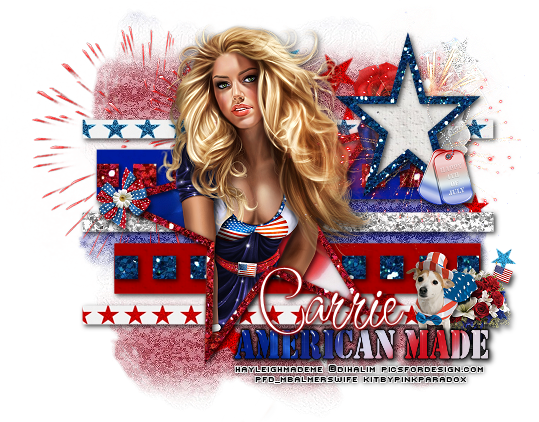
New CT Tag "American Made" Using Pink Paradox's "Stars & Stripes" Kit!
"Stars & Stripes" is a beautiful kit to work with. It has 70 elements, 9 frames & 12 papers. Here's a preview of the kit made by Pink Paradox Productions:
Head on over to PicsForDesign to purchase this awesome kit in time to use it for the 4th of July! Here's a tag I made using the kit titled "American Made." It features elements & papers from the Stars & Stripes kit and artwork by Di Halim also found at PicsForDesign:
Wednesday, June 5, 2013
New CT Tag "Pampered Pet"
My first tag made in over a week! Here's a sample of the kit used:
It's by PinkParadoxProductions and is called Pampered Pets. Visit her blog to find out where she's selling it. Here's the tag I made using the kit:
This kit is full of fun elements and papers and I enjoyed working with it.
Subscribe to:
Comments
(Atom)
About Me

- Hayleigh
- Oklahoma
- I'm a 30 year old SAHM to 3 adorable boys and newlywed to a wonderful husband. I've been using PSP for 9 years.
TOU
All of my tutorials, tags & cluster freebies are from my own imagination. Any resemblance to other tutorials is purely coincidental. If using a cluster freebie for a challenge, please link back to my blog to download; and if you download anything be sure to leave love so I know someone's using them =)
Search
Blog Archive
-
▼
2013
(85)
-
▼
June
(17)
- New Blog Layout
- Template #2
- New CT PTU Tutorial "Girly Goth"
- New CT Tag "Candyland"
- My First Template!!
- New CT Tag Showoff + Freebie Cluster Frame
- Name Script Tutorial
- "Fallen" Cluster Frame Freebie
- New PTU Tutorial "Fallen"
- New PTU Tutorial "Fortune Teller"
- *New* CT PTU Tutorial "Posh Pup"
- *SALE*
- Freebie Cluster Frame "Stars & Stripes"
- New CT Tag ShowOff *Summer Lovin'*
- New PTU Tutorial "My Angel"
- New CT Tag "American Made" Using Pink Paradox's "S...
- New CT Tag "Pampered Pet"
-
▼
June
(17)
Labels
- Alehandra_Vanhek (1)
- Alex Prihodko (6)
- Amy Matthews (2)
- Anna Marine (2)
- Arthur Crowe (5)
- Barbara Jensen (1)
- Blog Layouts (1)
- Celinart (5)
- Célinart (8)
- Cluster Frame (11)
- Cluster Set (1)
- Crazy Babbelstubb (1)
- CT (90)
- DesignsBySarah (5)
- Di_Halim (2)
- Elias Chatzoudis (4)
- Ellie_Milk (2)
- Exclusive (1)
- Freebie (8)
- FTU (13)
- FTU kit (1)
- Halloween (1)
- How To (1)
- Jackie's Jewels (8)
- Jose Cano (2)
- Keith Garvey (2)
- My kits (3)
- New Releases (1)
- Ninaste (3)
- Peaches Blogtrain (1)
- PicsForDesign (4)
- PimpinPSPers Warehouse (6)
- PinkParadox (50)
- PinkParadox Productions Store (45)
- PSP Help (1)
- PSP Tut (3)
- PTU (55)
- PTU Tut (28)
- Request (2)
- Sale (6)
- Showoff (59)
- Snags (5)
- Tag Showoff (7)
- Template (4)
- Trinita (6)
- Tutorial (8)
- Verymany (14)
- Verymany match (3)
- Zlata Ma (1)
Chat With Me!
Stamps


