I CT For


Check 'Em!


My Blinkies!

Peaches Blog Train!

My Avatars (DO NOT SNAG)


Thursday, December 26, 2013
PTU Tutorial "Naughty Girl" Artwork ©Celinart Pinup

Supplies Needed
- Paint Shop Pro (I use PSP X3 but any version will work)
- Tube of Choice (I used "Viorotica" & "Vanessa Lake" by Celinart Pinup. This tube may not be used without proper license. Find the tube at Celinart Pinup)
-Template: Template#5 by me; find this template on my blog HERE.
- Kit: "Naughty Girl Christmas" by PinkParadox Productions. This kit is a PTU kit, please do NOT share it.
- Plugins Used: Xero - Fritillary, Penta.com - Dot & Cross, Xero - Soft Vignette
- Mask: WSL_Mask58. This can be found HERE.
- Font of Choice (I used Precious)
- Elements: 1, 5, 7, 13, 14, 15, 16, 21, 24, 26, 30, 33, 38, 45, 78, 86, 107, 128, 130, 131, 157
- Papers: 3, 15, 18, 19, 22, 23, 34
All elements may need to be resized & sharpened to your liking. Please add a dropshadow of your choosing to each element as you go. Some abbreviations I use in this tutorials are c/p/r/s (copy & paste, resize & sharpen).
Open up your template and press CTRL + D to duplicate and close the original. Delete the credit layer of the template. Highlight the "background" layer and c/p/r/s paper 2, deleting any excess paper. Expand by 4 and flood fill with #000000. Add Noise Effect with these settings: 30, Gaussian & Monochrome checked. Deselect and do the same for #2 using the same paper 2. Do the same for layer #3 except use paper 23.
Next highlight layer #4, add a new raster layer and flood fill with #5d4472. Effects - Plugins - Xero - Soft Vignette with these settings: horizontal, background color, 19, -21, 17, 255. Do the same for layer #5. Next highlight layer #5 - Frame, add a new raster layer and flood fill with #000000. Add same noise settings used earlier. Highlight frame #6, c/p/r/s paper 15, deleting any excess paper.
For layers #7 & #8 c/p/r/s paper 35 arranging it so only the pink is visible. Delete excess paper. Open up a closeup copy of your chosen tube artist and place on top of paper layer making sure the face is inside the box; delete excess tube layer and mirror to the other side. For the blend mode of the tube layer use Luminace (L) and change the opacity to 55. Highlight the paper layer and use your blinds effect at these settings: 3, 61, color-white, both boxes checked.
For the frame layers of 7 & 8 add new raster layer and flood fill with #000000 and add previous noise settings. Highlight layer #9 c/p/r/s paper 19, delete excess paper. Paste your main tube and resize so the head is not too much higher the back circle layers. Open up all elements, c/p/r/s them and place where you like, using my example for reference. Elements 5, 7 & 86 were duplicated & mirrored and placed on the opposite side.
For the mask I used paper 18 for the outside circles and paper 34 (larger than the other two) for the middle circle.
Now add your name & copyrights and then save and your done!
This tutorial was written on 12/26/13 by Ruinations By Hayleigh. Any resemblance to another tutorial is purely coincidental. Tutorials written assuming you have previous knowledge of PSP.
Subscribe to:
Post Comments
(Atom)
About Me

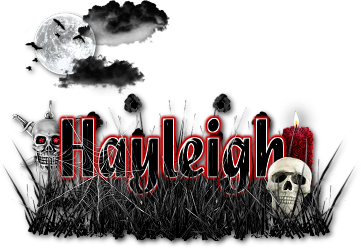
- Hayleigh
- Oklahoma
- I'm a 30 year old SAHM to 3 adorable boys and newlywed to a wonderful husband. I've been using PSP for 9 years.
CU Licenses

Stamps

0 comments:
Post a Comment