I CT For


Check 'Em!


My Blinkies!

Peaches Blog Train!

My Avatars (DO NOT SNAG)


Thursday, March 6, 2014
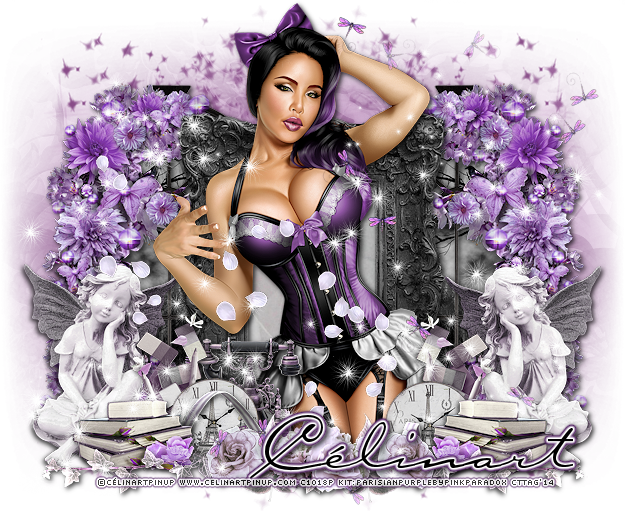
PTU Tutorial "Purple Lady" PinkParadox and CéliartPinup

Supplies Needed:
Photo Editing Software: I am using PaintShopPro X3 but any version will work.
Kit: "Parisian Purple" by PinkParadox Productions; this is a PTU kit, please do NOT share!
Tube: "Daisy Tube" by ©Célinart Pinup; this is a PTU, proper license needed!
Mask: "AP_SparkleMask3"; I've had this mask forever, but I can't remember where I got it from =(
Elements: 4, 13, 21, 26, 37, 80, 93, 95, 99, 100, 114, 116, 117 & 119 Frame: 3
Papers: 1, 16 & 25
Let's get started!
Open up a new canvas (I use 650x650, transparent checked); copy/paste element 80, resize/sharpen as preferred. Duplicate and mirror, arranging so they are an equal distance apart. Copy/paste your frame and resize/sharpen, place in the center of the two elements & erase any excess of the elements in the frame. Copy.paste paper 16 below your frame layer & resize/sharpen so the rose shows just inside the frame, erase any excess paper. Add desired dropshadow (I use 2, 2, 75 & 6.99, color black) to the 2 element 80's & the frame.
Open up your tube and copy/paste above the frame layer, and resize/sharpen. Add desired dropshadow and place in the center of the frame. Don't worry about the overhang of any legs from the bottom of the frame, we'll cover that with other elements & delete any hanging out from below those. Open up your elements and resize/sharpen as you prefer them. Copy/paste them onto your canvas, arranging how you want and adding dropshadows. I duplicated/mirrored the following elements: 4, 13, 26, 37, 95 & 100.
Now open up paper 25 and copy/paste below the two element 80's, resize and place so that the moon with the bird is showing through the window. Sharpen, erase any excess paper and then duplicate and mirror it to fit behind the other element with the same placement. Open up paper 1 and copy/paste to your canvas at the very bottom, above background layer. Apply your chosen mask (if using my my, I duplicated and merged the mask layer to make it show more). Now add your copyrights, name & you're done!!! I love seeing the creations you make using my tutorials, please feel free to send any to mbalmerswifetuts@gmail.com!
This tutorial was written by me, Ruinations By Hayleigh, on March 6, 2014 from my own imagination. Any resemblance to another tutorial is purely coincidental. Please do not claim this tutorial as your own. This was written assuming you have working knowledge of Paint Shop Pro.

Subscribe to:
Post Comments
(Atom)
About Me

- Hayleigh
- Oklahoma
- I'm a 30 year old SAHM to 3 adorable boys and newlywed to a wonderful husband. I've been using PSP for 9 years.
CU Licenses
Stamps

0 comments:
Post a Comment