My Licenses
MPT11646
CDO-4348
EAS14199
KG2666
PFD_mbalmerswife
PFD_6113
PTE0504
IRH3762A
SW5738
toosh2511
BHS-30
VMT_mbalmerswife
CI-4978-LM
SATC4343
AC1364
ZZT3579
C1018P
Powered by Blogger.
My Avatars (DO NOT SNAG)










Monday, May 13, 2013
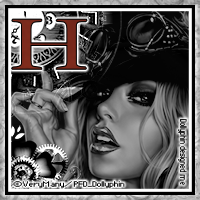
PTU Tutorial "SteamPunk Princess"
This tutorial was written assuming you have a working knowledge of PSP.
Supplies Needed:
:|: Tube :|:
I am using a fab tube from VeryMany. You can purchase this tube at PicsforDesign. Do NOT use VeryMany's tubes without the proper license!
:|: Kit :|:
Steampunk Dreams by Designs By Sarah. You can purchase this kit at PimpMyTagsWithScraps. Please do NOT share this kit.
:|: Font :|:
Penshurst & Victor's Pixel Font (both are FTU and can be found at dafont)
:|: Plugins :|:
EyeCandy4000-GradientGlow, EyeCandy4000-Glass
:|: Mask :|:I used a mask from weescottslass; download WSL_236.
:|: Elements :|:
sb_pmt_steampunk-dreams-frame 3
sb_pmt_steampunk-dreams-eyelet 1
sb_pmt_steampunk-dreams-butterfly
sb_pmt_steampunk-dreams-beads 1
sb_pmt_steampunk-dreams-flower 1
sb_pmt_steampunk-dreams-flower 2
sb_pmt_steampunk-dreams-greenery 2
sb_pmt_steampunk-dreams-leaves 1
:|: Papers :|:
sb_pmt_steampunk-dreams-pp2
sb_pmt_steampunk-dreams-pp1
Lets get started!! Open a new project; copy and paste sb_pmt_steampunk-dreams-frame 3, resize/sharpen as preferred. Open sb_pmt_steampunk-dreams-pp2, Layers -> Load/Save Mask -> Load Mask From Disk and choose WSL_236. Merge group, resize & sharpen as preferred or so that only a little bit of the mask peeks out behind the frame.
Open sb_pmt_steampunk-dreams-pp1, use your magic wand click inside the frame, expand by 3, invert. Activate paper layer and hit delete on the keyboard twice. Now open up all other elements except the beads, resize/sharpen as preferred and arrange like my example or however you like them. I mirrored everything so they were equal on both sides.
Open up the beads, resize/sharpen and place above paper layer but below frame layer. Duplicate as many times as needed so they cover the paper evenly. Then add the tube below the frame layer. Use your eraser tool to erase any excess tube below the flower arrangement. Activate your frame layer and zoom 200% to see the outlines better. Erase the frame that overlaps her face (I kept her ponytail behind the frame cause I think it looks cool that way but you can erase that part of the frame as well).
Add a dropshadow of 2, 2, 75, 6.99, black to all elements, the tube & the frame. Add your name ( I used EyeCandy4000-Gradient Glow & Glass on my name) and all copyrights. You're done! If you make a tag using this tutorial please email it to me! I'd love to see what you guys make!
Subscribe to:
Post Comments
(Atom)
About Me

- Hayleigh
- Oklahoma
- I'm a 30 year old SAHM to 3 adorable boys and newlywed to a wonderful husband. I've been using PSP for 9 years.
TOU
All of my tutorials, tags & cluster freebies are from my own imagination. Any resemblance to other tutorials is purely coincidental. If using a cluster freebie for a challenge, please link back to my blog to download; and if you download anything be sure to leave love so I know someone's using them =)
Search
Blog Archive
-
▼
2013
(85)
-
▼
May
(15)
- CT Tag Showoff
- PTU Tut "In The Garden"
- PTU Tut "Heart of Hearts"
- Sale Time!!
- Future Offer/Tag Showoff
- Cluster Frame Freebie
- New CT Tag "Deadly"
- PTU Tutorial "SteamPunk Princess"
- New CT Tag "So Blue"
- New CT Tag "Think Pink"
- Re-Doing My Blog
- PTU Tutorial "Love"
- Tag Showoff!
- Tag Showoff!
- PTU Tutorial "Always"
-
▼
May
(15)
Labels
- Alehandra_Vanhek (1)
- Alex Prihodko (6)
- Amy Matthews (2)
- Anna Marine (2)
- Arthur Crowe (5)
- Barbara Jensen (1)
- Blog Layouts (1)
- Celinart (5)
- Célinart (8)
- Cluster Frame (11)
- Cluster Set (1)
- Crazy Babbelstubb (1)
- CT (90)
- DesignsBySarah (5)
- Di_Halim (2)
- Elias Chatzoudis (4)
- Ellie_Milk (2)
- Exclusive (1)
- Freebie (8)
- FTU (13)
- FTU kit (1)
- Halloween (1)
- How To (1)
- Jackie's Jewels (8)
- Jose Cano (2)
- Keith Garvey (2)
- My kits (3)
- New Releases (1)
- Ninaste (3)
- Peaches Blogtrain (1)
- PicsForDesign (4)
- PimpinPSPers Warehouse (6)
- PinkParadox (50)
- PinkParadox Productions Store (45)
- PSP Help (1)
- PSP Tut (3)
- PTU (55)
- PTU Tut (28)
- Request (2)
- Sale (6)
- Showoff (59)
- Snags (5)
- Tag Showoff (7)
- Template (4)
- Trinita (6)
- Tutorial (8)
- Verymany (14)
- Verymany match (3)
- Zlata Ma (1)
Chat With Me!
Stamps








0 comments:
Post a Comment