I CT For


Check 'Em!


My Blinkies!

Peaches Blog Train!

My Avatars (DO NOT SNAG)


Tuesday, May 21, 2013
PTU Tut "Heart of Hearts"
This tutorial was written assuming you have a working knowledge of PSP.
SUPPLIES
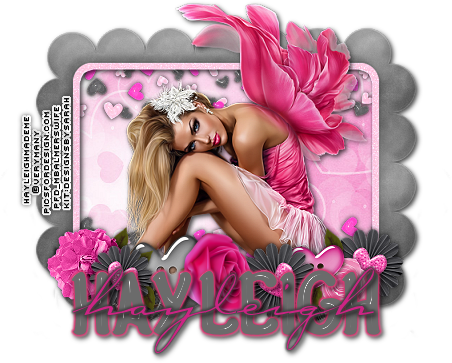
:|: Tube :|:
I used the "Flower Fairy" tube from VeryMany. You can purchase that tube at PicsforDesign; please do NOT use any PTU tubes without the proper license.
:|: Kit :|:
I am using the fantastic kit "Boy Meets Girl" created by Designs By Sarah. This kit can be purchased at PimpMyTagswithScraps.
:|: Plugins :|:
EyeCandy4000-Gradient Glow
EyeCandy4000-Glass
:|: Fonts :|:
:|: Elements :|:
sb_pmt_boy-meets-girl_bow 1
sb_pmt_boy-meets-girl_button 1
sb_pmt_boy-meets-girl_button 2
sb_pmt_boy-meets-girl_flower 1
sb_pmt_boy-meets-girl_flower 2
sb_pmt_boy-meets-girl_flower 3
sb_pmt_boy-meets-girl_frame 1
sb_pmt_boy-meets-girl_heart line
sb_pmt_boy-meets-girl_rose 1
:|: Papers :|:
sb_pmt_boy-meets-girl_pp4
Lets get started! Begin a new project (700x700-transparent), open your frame, copy/paste & resize/sharpen as preferred. Next grab your magic wand and click inside the frame - Selections - Expand (expand by 5). Open your paper, copy/paste, resize/sharpen - Selections - Invert and hit delete to delete the excess paper outside the frame. Move the paper layer below the frame layer. Open the heart line, resize/sharpen. Activate the paper layer - Selections - Select All - Float - Defloat - Invert. Activate the heart line layer & hit delete on your keyboard to delete excess line. Apply the glass effect using the following settings:

Position below the top of the frame towhere some is poking out (use my tag as an example of placement), duplicate and position that one at the bottom to match the top. Next open up the rest of the elements (on the bow I deleted everything but the ribbon in the center attaching the two bows), resize/sharpen as preferred and arrange to your liking (use my example for reference). Now open your tube, copy/paste & resize to your liking and position just below all the elements, erasing any leftover foot peeking out at the bottom.
Apply dropshadow to all layers except paper layer. Add name (I did Guitar On Stage in ALL CAPS then did the same name using Carpenter Script above the CAPS name layer) and all copyrights then you're done! No mask for this one. If you make this tag, please send me a copy to display on my blog!!
Subscribe to:
Post Comments
(Atom)
About Me

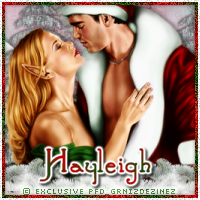
- Hayleigh
- Oklahoma
- I'm a 30 year old SAHM to 3 adorable boys and newlywed to a wonderful husband. I've been using PSP for 9 years.
CU Licenses

Stamps

0 comments:
Post a Comment