I CT For


Check 'Em!


My Blinkies!

Peaches Blog Train!

My Avatars (DO NOT SNAG)


Monday, May 13, 2013
New CT Tag "So Blue"
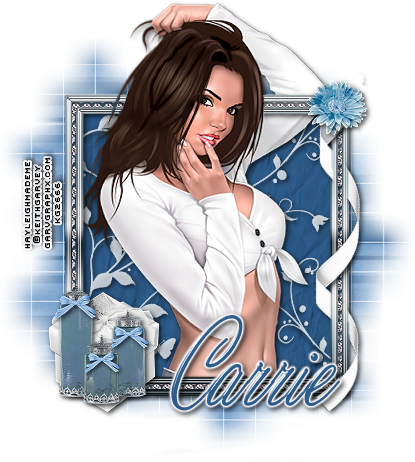
Hey I got to play around with Carrie's newest kit in stores called "So Blue." You can purchase that kit at Wickedly Ditzy Scraps! Here's a preview of the kit:


And here's the tag I made with it; tutorial for this tag will come at a later date (click to view normal size):
Saturday, May 11, 2013
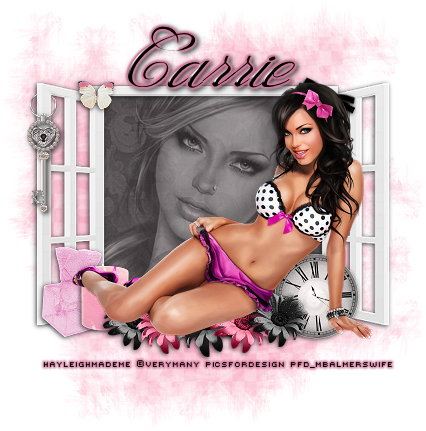
New CT Tag "Think Pink"


Monday, May 6, 2013
Re-Doing My Blog
So I'm in the process of re-doing my blog layout and stuff so if you see it and it looks a little weird, that's why. I'm hoping it'll be bangin when it gets done.

Sunday, May 5, 2013
PTU Tutorial "Love"
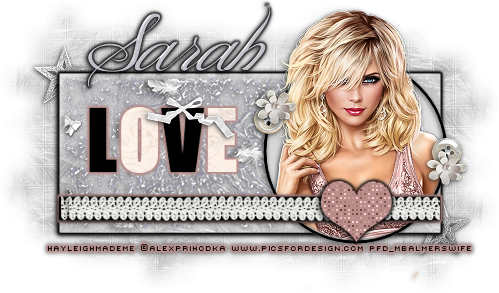
Designs by Sarah has a fabulous kit at Pimp My Tags with Scraps called "Like a Virgin." I had the pleasure of working with it and it's one of my favorites! Without further ado, here's the tutorial (click the image to see it full-size):

Open up the template - CTRL+D to duplicate and close the original. Open sb_pmt_like-a-virgin_pp3, copy/paste and resize/sharpen as preferred. Paste above the large rectangle layer. Selection -> Select All -> Float -> Defloat -> Invert and delete excess paper. Apply gradient glow to the paper layer and dropshadow.
Next up is the circle layer. Open sb_pmt_like-a-virgin_pp11, copy/paste and resize/sharpen as preferred. Paste above the circle layer Selection -> Select All -> Float -> Defloat -> Invert and delete excess paper. Make a border around the circle background and flood fill black; add dropshadow.
Now for the wordart. Activate the wordart layer. Open sb_pmt_like-a-virgin_pp8, copy/paste and resize/sharpen as preferred. Use your magic wand, click inside the "L" & "V" letters, add new raster layer and flood fill black. Deselect. Now use your magic wand to select the "O" & "E" letters. Selections -> Invert and delete excess paper. Add gradient glow and dropshadow.
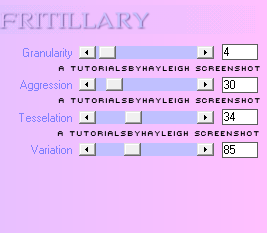
Activate the thin rectangle layer & Selections -> Select All -> Float -> Defloat; add a new raster layer and flood fill black. Add gradient glow & dropshadow then open element sb_pmt_like-a-virgin_ribbon 2, resize/sharpen and place over the black rectangle. Activate the heart layer & Selections -> Select All -> Float -> Defloat; add a new raster layer and flood fill with #b88d8a. Effects -> Plugins -> Xero -> Fritillary and use these settings:
Supplies Needed:
:|: Tube: I am using a tube by Alex Prihodka called "Springtime." Please go HERE to purchase this tube; do NOT use this tube without the proper license.
:|: Kit: I am using Designs By Sarah's "Like A Virgin." This is a PTU kit and it can be purchased HERE.
:|: Mask: I am using WSL_Mask84 which you can find HERE on the blog.
:|: Template: I am using missy_tagtemplate139 which can be found HERE on her blog.
:|: Filters: EyeCandy4000 - Glass & Gradient Glow, Xero-Fritillary
:|: Fonts: Shit Happens & Victor's Pixel Font
Let's get started!
Next up is the circle layer. Open sb_pmt_like-a-virgin_pp11, copy/paste and resize/sharpen as preferred. Paste above the circle layer Selection -> Select All -> Float -> Defloat -> Invert and delete excess paper. Make a border around the circle background and flood fill black; add dropshadow.
Now for the wordart. Activate the wordart layer. Open sb_pmt_like-a-virgin_pp8, copy/paste and resize/sharpen as preferred. Use your magic wand, click inside the "L" & "V" letters, add new raster layer and flood fill black. Deselect. Now use your magic wand to select the "O" & "E" letters. Selections -> Invert and delete excess paper. Add gradient glow and dropshadow.
Activate the thin rectangle layer & Selections -> Select All -> Float -> Defloat; add a new raster layer and flood fill black. Add gradient glow & dropshadow then open element sb_pmt_like-a-virgin_ribbon 2, resize/sharpen and place over the black rectangle. Activate the heart layer & Selections -> Select All -> Float -> Defloat; add a new raster layer and flood fill with #b88d8a. Effects -> Plugins -> Xero -> Fritillary and use these settings:
Now open up the following elements: sb_pmt_like-a-virgin_star, sb_pmt_like-a-virgin_scatter 4, sb_pmt_like-a-virgin_flower 2, sb_pmt_like-a-virgin_button 2 & sb_pmt_like-a-virgin_bow 1. Resize/sharpen and place as you want or where I placed mine in the example. Next up is the tube!
Open up your tube, resize/sharpen as preferred and place below the border layer for your circle. Delete excess tube on the bottom portion of the circle and delete border covering the tubes face with the eraser tool. Done?
Open up sb_pmt_like-a-virgin_pp3 and place below the big rectangle. Apply mask and resize/sharpen as you like. Now add the name (I used the EyeCandy4000-Glass filter on the name) and all copyrights. Crop out the excess background & save as a .png file and your done!
Saturday, May 4, 2013
Tag Showoff!
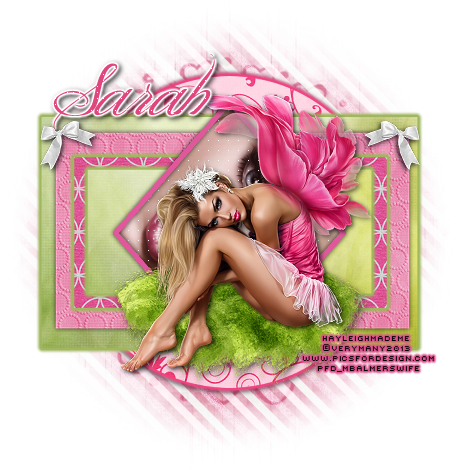
I made this tag using Designs By Sarah's Collab kit titled "Lily." You can find the link HERE to purchase her part of this great collab! Here's a preview of the kit:


Here's the tag I made with it:
Thursday, May 2, 2013
Tag Showoff!
Sweet Addictionz Scraps has a great FTU kit out called Beach Bound! Here's a preview of the kit:


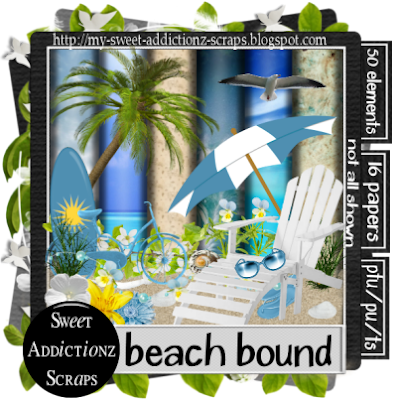
You can download it at her blog found HERE! It's a great kit; remember to leave love if you download!
Here's a tag I made with the kit:

Wednesday, May 1, 2013
PTU Tutorial "Always"

Supplies Needed
:|: Tube: I used a FTU tube by ZindyNielson. You can find that tube HERE. Don't forget to use the proper copyrights!
:|: Template: I used a template by Yvette. Template is included in the supplies folder.
:|: Mask: I used a mask by Vix.
:|: Kit: Kit used is a PTU from Designs By Sarah called Cordially Invited. You can purchase this kit HERE at her store. This is a great kit Sarah!
:|: Filters: EyeCandy4000-GradientGlow, Xero-Fritillary, EyeCandy4000-Glass.
:|: Font: I used Great Vibes and Victor's Pixel Font.
:|: Supplies Folder: Find the supplies HERE.
Let's get started!
Open up the template from the supplies folder - CTRL+D to duplicate and close the original. Open sb_pmt_cordially_invited_pp2, copy/paste and resize/sharpen as preferred. Paste above the large rectangle layer. Selection -> Select All -> Float -> Defloat -> Invert and delete excess paper. Apply gradient glow to the paper layer and dropshadow.
Next up is the circle layers. Open sb_pmt_cordially_invited_pp8, copy/paste and resize/sharpen as preferred. Paste above the first circle layer, duplicate and move the duplicated paper layer above the other circle layer. Selection -> Select All -> Float -> Defloat -> Invert and delete excess paper. Apply gradient glow to the paper layer and dropshadow. Do the same for the other circle layer.
Now for rectangle 1. Activate the rectangle1 layer. Open sb_pmt_cordially_invited_pp11, copy/paste and resize/sharpen as preferred. Selection -> Select All -> Float -> Defloat -> Invert and delete excess paper. Effects -> Plugins -> xero -> Fritillary and use the following settings:

Apply gradient glow (color is #801616) to the paper layer and dropshadow.
Activate the background layer. Open sb_pmt_cordially_invited_pp3, copy/paste and resize/sharpen as preferred. Selection -> Select All -> Float -> Defloat -> Invert and delete excess paper. Activate the Frame layer. Selection -> Select All -> Float -> Defloat, add a new raster layer and flood fill inside the ant lines with black. Apply gradient glow (color is #801616) to the black frame layer and dropshadow.
Now open the following elements: sb_pmt_cordially_invited_brooch, sb_pmt_cordially_invited_button 1, sb_pmt_cordially_invited_key, sb_pmt_cordially_invited_leaves 1, sb_pmt_cordially_invited_ribbon 4, sb_pmt_cordially_invited_sparkle 1 and sb_pmt_cordially_invited_word art 1. Copy/paste and resize/sharpen as preferred and place like mine or however you like them.
Now for the mask. Open sb_pmt_cordially_invited_pp11 and place at the bottom of the layers. Layers -> Load/Save Mask -> Load Mask from Disk and choose Vix_BigMask019 from the dropdown menu. Merge group and resize/sharpen to your liking.
Now add name and all copyrights and save as a .png file and your done!
Subscribe to:
Posts
(Atom)
About Me

- Hayleigh
- Oklahoma
- I'm a 30 year old SAHM to 3 adorable boys and newlywed to a wonderful husband. I've been using PSP for 9 years.
CU Licenses

Stamps
