I CT For


Check 'Em!


My Blinkies!

Peaches Blog Train!

My Avatars (DO NOT SNAG)


Wednesday, February 26, 2014
CT Tags & Snags "A Kiss for Luck" PinkParadox Productions
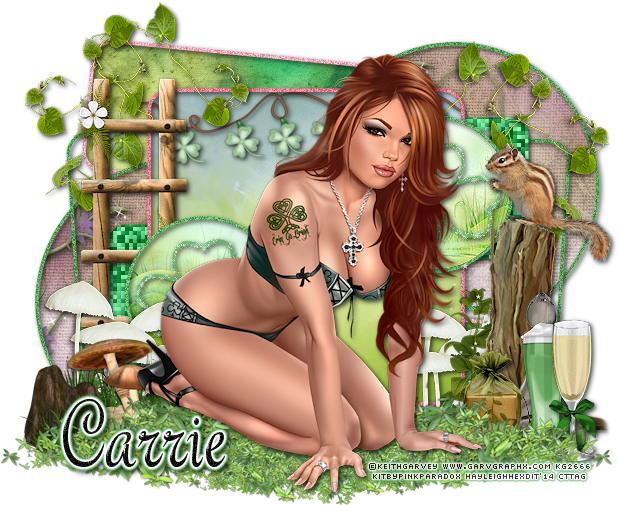
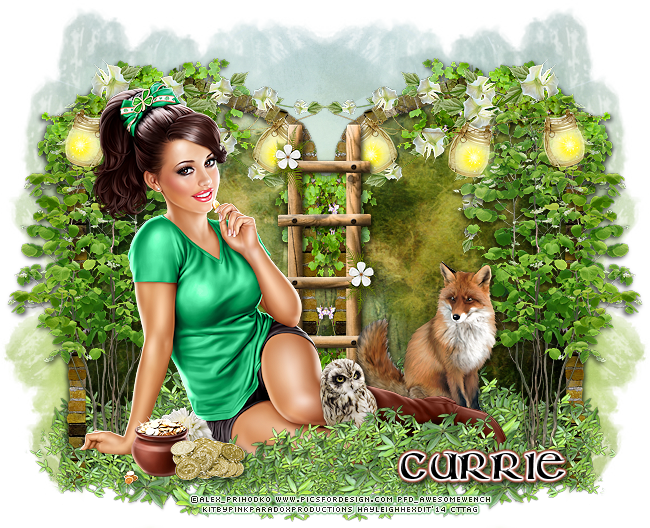
I have a fabulous kit to show you today! It's called "A Kiss for Luck" and is by the fabulous PinkParadox Productions. Right now you can get this kit for FREE with purchase of $5.00 or more & trust me, this kit is totally worth it. It has elements covering not only St. Patrick's Day but also spring and even has girly elements. The possibilities are endless! Packed with 180 elements, 19 frames & 50 papers, here's a preview of the kit:

Purchase this kit HERE and below are some snags I made for you (please click on the image to save it fullsize so the copyright is shown clearly):


Friday, February 21, 2014
Amazing Kits From PinkParadox Productions On Sale NOW!

PinkParadox Productions is having an awesome 25% off kit/cluster frames now through the end of February! The ones above are just a taste of what PinkParadox has to offer at her private store! Here are the purchase links to the kits shown above:
"Pink Sunshine" - Bright, girly & refreshing! Like a pink lemonade on a perfect summer day =) Designed to match Verymany's "Rosemary" tube. Find the tube HERE & the kit HERE!
"Sweet Spring" - Soft & sweet with a touch of country living. Find the kit HERE.
"Tropical Birthday" - Mix and match tropical elements and birthday elements; designed to match Verymany's "Bling Bling Birthday" tube. Find the kit HERE and the tube HERE.
"Hint of Spring" - Versatile spring kit with the color palette to also work for early Autumn; designed to match "Jill" tube by Verymany. Find the kit HERE & the tube HERE.
"Touch the Rainbow" - A beautiful kit with a rainbow of colors; make it monochromatic or mix and match colors; designed to match "Julia" tube by Verymany. Find the kit HERE & the tube HERE.
"Summer Lovin'" - A sizzling summer kit with elements to work sun-up to sun-down; designed to match "Dina" tube by Verymany. Find the kit HERE & the tube HERE.
Wednesday, February 19, 2014
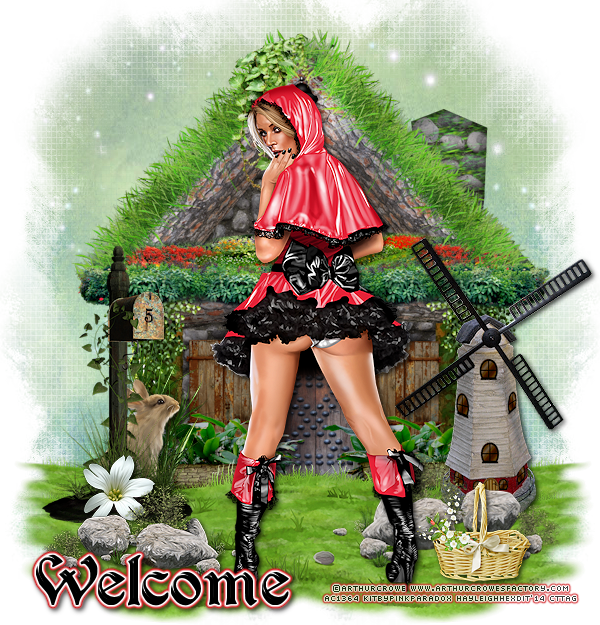
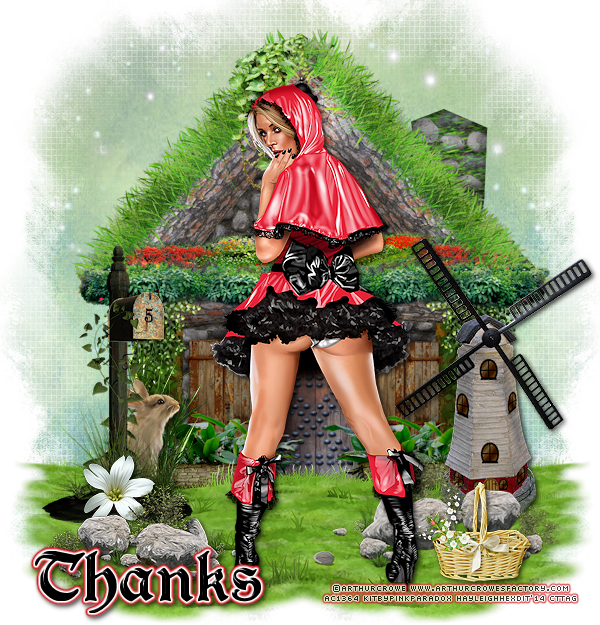
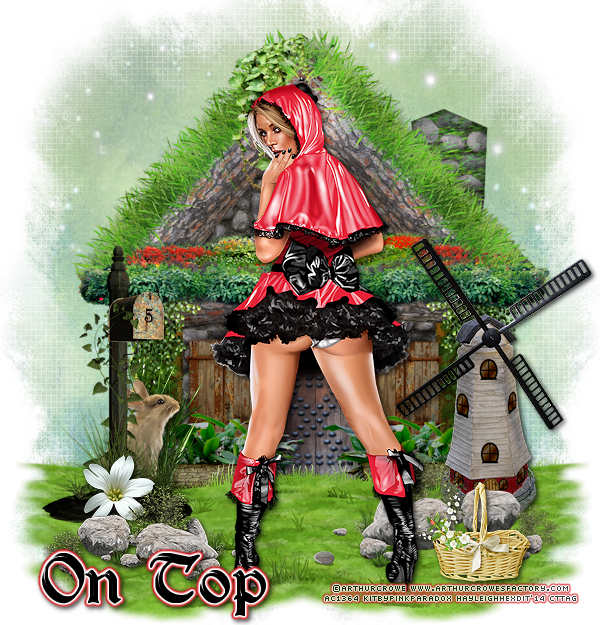
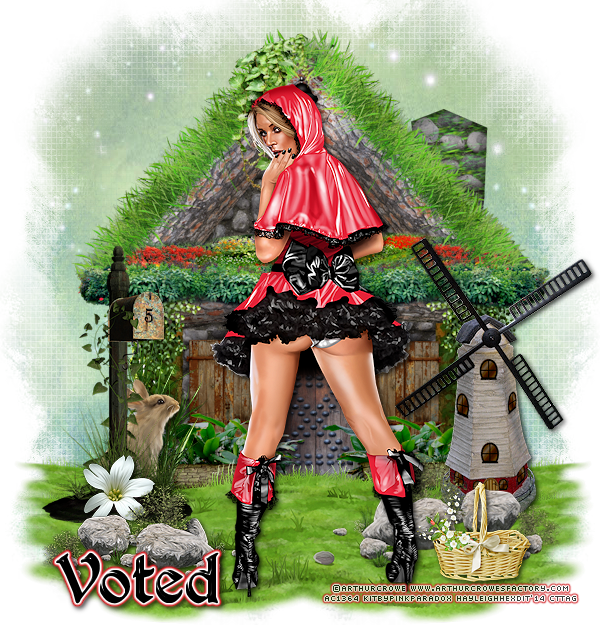
CT Tags & Snags "Beware the Wolf" kit by PinkParadox Productions
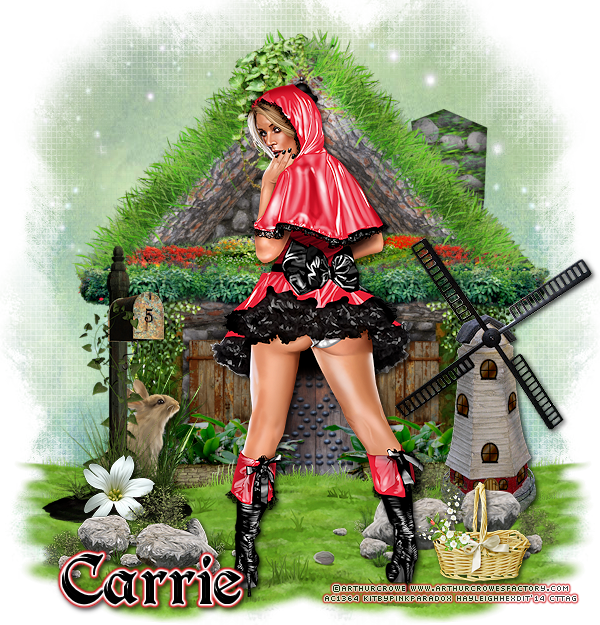

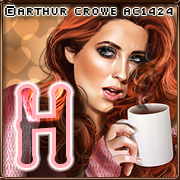
Awesome "Beware the Wolf" kit inspired by the Little Red Riding Hood story. This kit is a gorgeous mix of animals, greenery, flowers and elements from the story. I have paired this beautiful kit with "Red Riding Hood" by José Cano & another tag made using "Little Babe Red" by Arthur Crowe. You can find snags at the bottom of this post! Here's purchase links for the kit & the tubes:
"Beware the Wolf" kit HERE, "Little Red Babe" tube by Arthur Crowe HERE & "Red Riding Hood" tube by José Cano HERE! Here are some snags I made for you (please click on the image to save the full size version where you can clearly see the copyright!):
Sunday, February 16, 2014
CT PTU Tutorial "Gothic Mermaid" kit - PinkParadox & "Lily Goth Mermaid" tube CélinartPinup

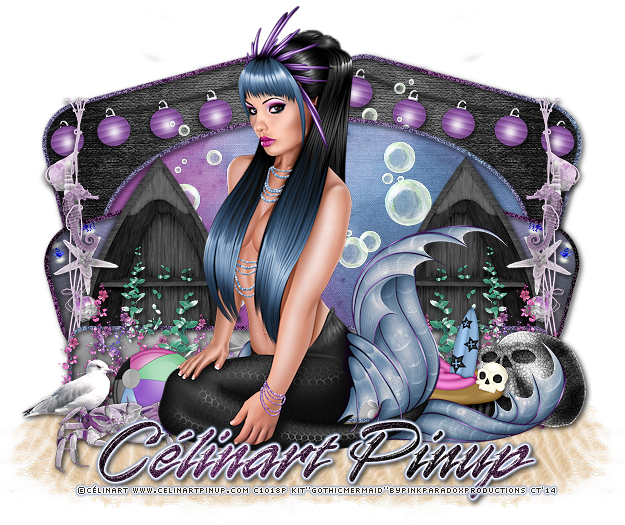
Supplies Needed:
Photo Editing Software: I am using Paint Shop Pro X3, but any version will work.
Kit: "Gothic Mermaid" by PinkParadox Productions; this is a PTU kit, please DO NOT share.
Tube: "Lily Goth Mermaid" by Célinart Pinup; this is a PTU tube, do not use without proper license.
Template: "PBS-Template 148" by Punky Butts. Find the template HERE!
Plugins/Filters: EyeCandy 4000 - Gradient Glow, Glass (used on name)
Elements: 2, 10, 29, 36, 70, 72, 95, 131, 133 & 147 Papers: 15, 35, 36 & 41
Let's get started!
First open up your template and hit SHIFT + D to duplicate it and then close the original. First we're going to delete a few of the layers. Delete layers: PBS Credits, Fonts Used, Hearts, Hearts Frame, Cane, Cane Frame, Raising WA, Raising Frame & dots. Now resize all layers to your preferred and then change the canvas size to 650x650. We're gonna highlight "left large square" layer; open paper 41 and copy/paste to your canvas. Resize/sharpen and erase any excess paper. Repeat steps for "right large square" layer.
Now highlight "left large square frame" - Selections - Select All - Float - Defloat, add a new raster layer and flood fill with gradient made using #6f84a0 & #663366. Add a noise setting of 50 and desired dropshadow. Repeat steps for "right large square frame" layer. Highlight "oval" layer; copy/paste paper 35, resize/sharpen and erase any excess paper. Highlight "oval frame" layer - Selections - Select All - Float - Defloat, add a new raster layer and fill with previous gradient; add a noise setting of 50 and desired dropshadow.
Highlight "left small square"; copy/paste paper 15, resize/sharpen and erase any excess paper. Repeat steps for "right small square" layer. Highlight "small square frame" layer - Selections - Select All - Float - Defloat, add a new raster layer & flood fill with a gradient made using #000000 & #663366. Add a noise setting of 50 and desired dropshadow. Repeat steps for "right small square frame" layer. Highlight "rectangle" layer; copy/paste paper 36, resize/sharpen and erase any excess paper. Highlight "rectangle frame" layer - Selections - Select All - Float - Defloat, add a new raster layer and floodfill with the black/purple gradient. Add a noise setting of 50 and desired dropshadow.
Now add your tube. If you use the "Lily Goth Mermaid" you may want to use her desaturated layers to color her like you want. Now open up your elements and place where you want them (use my example for reference if you like). Add a desired dropshadow to them. Add name & copyrights and then you're done! Please feel free to send me any creations you make using this tutorial to mbalmerswifetuts@gmail.com!
This tutorial was written by me, Ruinations By Hayleigh, on February 16, 2014. Any resemblance to another tutorial is coincidental. I wrote this assuming you have working knowledge of Paint Shop Pro. Please do NOT claim this tutorial as your own!!
Wednesday, February 12, 2014
PTU Tutorial "Lucky Girl" kit by PinkParadox Productions & "Katty" tube by ©Célinart Pinup
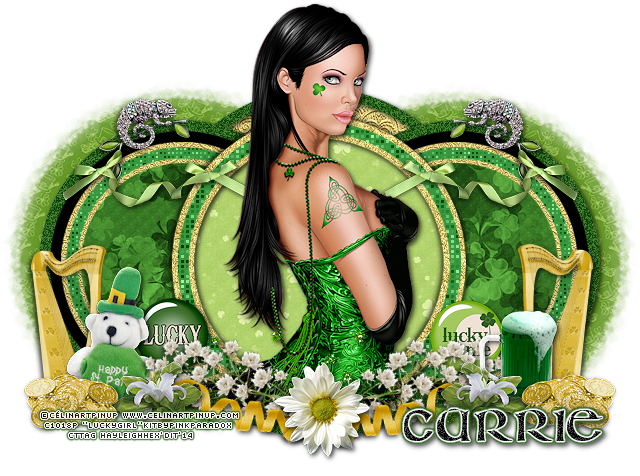

Supplies Needed:
Photo Editing Software: I use Paint Shop Pro X3 but any version will work.
Kit: "Lucky Girl" by PinkParadox Productions; this is a PTU kit, please do NOT share.
Tube: "Katty" by Célinart Pinup; this is a PTU tube; do not use without proper license.
Template: "Pbs-Template150" by Punky Butts. Find the template HERE.
Mask: "WSL_Mask209" by weescotslass. Find the mask HERE.
Elements: 4, 5, 15, 18, 22, 41, 42, 49, 70, 73, 74, 76 & 80; Papers: 5, 7, 8, 9 & 10
Let's get started!
First open up your template and hit SHIFT + D to duplicate, then close the original file. Let's delete the layers we don't need. They are: PBS Credits, Fonts Used, Naughty List, Naughty List Frame, even has a wordart, even has a frame, You're the reason wordart, You're the reason frame, 2, 1 & dots leaving you with layers 3-17.
Highlight layer 3; open up paper 9, copy/paste onto canvas, resizing/sharpening and adding a dropshadow as you go. Erase any paper hanging out around the circle. Highlight layer 4; Selections -> Select All -> Float -> DeFloat. Add a new raster layer & flood fill frame selection with #2a611b; add noise of 40, monochrome & guassian checked then add a dropshadow.
Highlight layer 5; Selections -> Select All -> Float -> DeFloat. Add a new raster layer & flood fill frame selection with #2a611b; add noise of 40, monochrome & guassian checked then add a dropshadow. Repeat steps for layer 6. Leave layers 7 & 8 like they are. Highlight layer 9; copy/paste paper 9 and resize/sharpen, erasing any paper outside the circle. Repeat steps for layer 11.
Highlight layer 10; Effects -> Plugins -> Xero -> Fritillary with these settings: 5, 30, 48, 101. Repeat steps for layer 12. Highlight layer 13; open paper 7 and copy/paste to your canvas, resizing and sharpening so none shows outside the circle. Repeat these steps for layer 14. Highlight layer 15; open up paper 8 and copy/paste it to your canvas. Resize & sharpen so none shows outside the circle.
Highlight layer 16; open up paper 10 & copy/paste it to your canvas, resizing and sharpening so none pokes outside the circle. Add desired noise setting and dropshadow. Last is layer 17; add the preview Fritillary settings and a dropshadow. Now lets move on to the elements/tube!
Copy/paste/resize/sharpen your tube onto your canvas, placing the tube in the middle of the large center circle. Add any filters/dropshadow that you want. Open up your elements and place where desired (using my tag for reference if you like). I duplicated/mirrored layers 15, 41, 42, 49, 70 & 76. I free rotated layers 76 & 70 so they'd be sideways. Add a dropshadow to all element layers.
Open up paper 5 and place below everything but above any background layer you have. Apply your mask, resizing if needed. Place to the right so the mask shows just outside the circles & then duplicate & mirror it. Now just add your name & copyrights and you're done! Please feel free to send me any creations you make using my tutorial to mbalmerswifetuts@gmail.com.
This tutorial was written on 2/12/14 by me, Ruinations By Hayleigh, and is from my own imagination. Any similarity to another tutorial is coincidental. This tutorial was written assuming you have working knowledge of PSP. Do NOT claim this tutorial as your own!
Monday, February 10, 2014
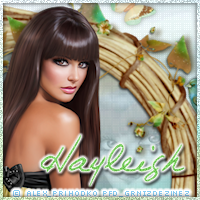
CT Tag Show-off "Spring Fantasy" PinkParadox Productions

I have an awesome new kit to showoff to you today! It's called "Spring Fantasy" and is by the fabulous PinkParadox Productions. This kit is a beautiful selection of spring, fairy and fantasy elements in a rainbow of colors! It has a lot of options for different tags year round! This kit was designed to match "Butterfly" tube by Verymany and it's a beautiful match! This kit has 150 elements, 17 frames & 45 papers. Get the kit HERE and the tube it was made to match HERE!

Wednesday, February 5, 2014
**New Releases from PinkParadox Productions!!!**

I have exciting news! First thing: PinkParadox Productions is having an awesome February sale going on RIGHT now! Kits/cluster frame sets are now 25% off! Plus keep your eyes open for some awesome new things coming to the store including free with purchase kits!
Next I have some *NEW* releases to show you! Here some information about each of them (and their purchase links):
"Lost In Wonderland": This kit is a fantastic representation of Alice in Wonderland! It has a massive 185 elements, 15 frames & 35 gorgeous papers!! It also has some dark/gothic elements so it's very versatile! Purchase this kit HERE!
"Sweet Spring": This kit is soft & sweet with a touch of country living! It is such a beautiful spring kit. It has 115 elements, 10 frames & 25 papers in gorgeous shades of pink and denim!! Purchase this kit HERE!
"Black Swan": This kit is a beautiful and poetic descent into darkness! It has a soft sight & also a dark side is a match to Verymany's "Black Swan" tube! It has 145 elements, 20 frames & 35 papers in shades of pink, black & white. Purchase the kit HERE & the tube HERE!
"Spring Fantasy": This kit is a beautiful selection of spring, fairy & fantasy elements in a rainbow of colors. It has lots of options for designs all year! And its a match to Verymany's "Butterfly" tube. It has 150 elements, 17 frames & 45 papers in all shades of the rainbow! Purchase the kit HERE and the tube HERE!
Sunday, February 2, 2014
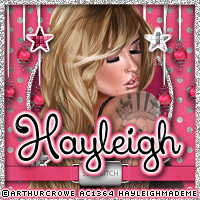
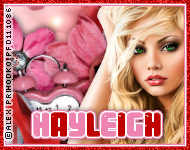
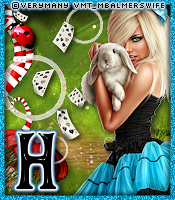
CT Tag Show-off "Lost In Wonderland" PinkParadox Productions *Snags Included*
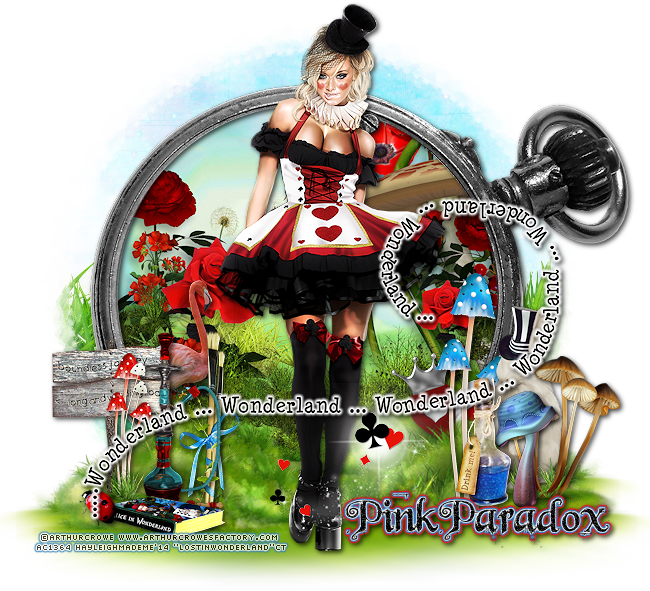
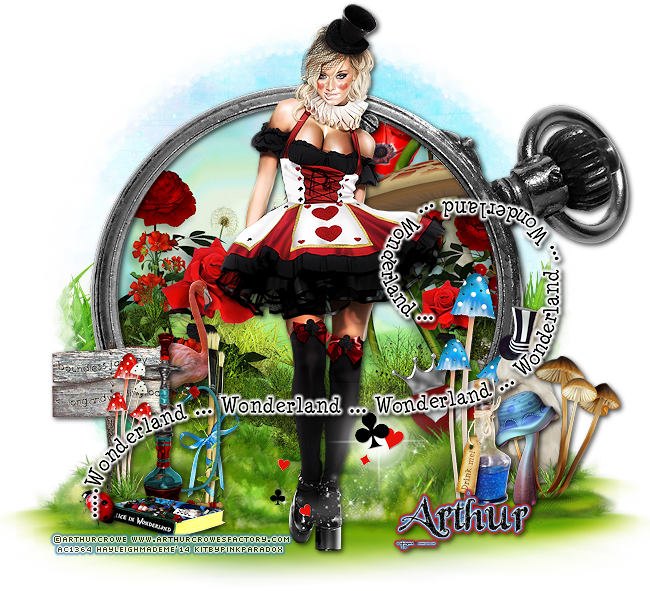
I have an AWESOME kit to show-off today! It's called "Lost in Wonderland" and is an awesome representation of Alice in Wonderland. It is full of magical, whimsical and beautiful elements, papers & frames. I have paired with the gorgeous new tube "Lady Queen Heart" by ©Arthur Crowe =) Here's a preview of the kit:

Here's some snags for you (click to view full size!):


Subscribe to:
Posts
(Atom)
About Me

- Hayleigh
- Oklahoma
- I'm a 30 year old SAHM to 3 adorable boys and newlywed to a wonderful husband. I've been using PSP for 9 years.
CU Licenses

Stamps